Studio Apartment Design: 12 Layout Ideas, Space-Saving Tips & AI Planning (2026)
A studio apartment is the ultimate design challenge: one room that needs to be your bedroom, living room, dining room, and sometimes home office — all at once. Get it wrong and you live in a cluttered box. Get it right and you have a space that feels intentional, stylish, and surprisingly spacious.
This guide covers 12 proven studio layouts for every room shape and size, practical space-saving furniture that actually works, zoning techniques used by professional interior designers, and how to plan your entire studio in 3D with AI — for free — before you move a single piece of furniture.
Why Studio Apartment Design Is Different
Designing a studio is not the same as designing a small apartment. In a small apartment, each room has one purpose. In a studio, every square meter serves multiple functions. Your sofa is also your guest bed. Your dining table is also your desk. Your bedroom is also your living room.
This means the usual interior design rules — pick a style, buy matching furniture, fill the room — do not apply. Studio design is about strategic space planning: what goes where, what serves double duty, and what creates the illusion of separate rooms in a single open space.
The difference between a studio that feels cramped and one that feels like a curated loft? Layout. Everything starts with how you divide and organize the space.
How Big Is a Studio Apartment? Size Guide
Before choosing a layout, know what you are working with. Studio apartments vary widely in size depending on city and market:
- Micro studio: 15-22 m² (160-240 sq ft) — common in Tokyo, Hong Kong, Paris. Every centimeter counts.
- Small studio: 22-30 m² (240-320 sq ft) — typical European studio. Room for a bed, sofa, and small kitchen.
- Standard studio: 30-40 m² (320-430 sq ft) — most common size in the US and UK. Comfortable for one person.
- Large studio: 40-55 m² (430-590 sq ft) — feels like a one-bedroom if you zone it well.
The layouts below are tagged by minimum size so you can skip directly to ideas that fit your space.
12 Studio Apartment Layouts That Actually Work
Layout 1: The Linear (Best for Rectangular Studios, 25+ m²)
The most classic studio layout. Everything flows in a straight line from back to front:bed → divider → sofa → dining/kitchen. The sleeping area is furthest from the entrance, giving it the most privacy.
How it works:
- Place the bed against the back wall, facing away from the entrance
- Use a bookshelf, curtain, or half-wall as a room divider
- Living area (sofa + coffee table) sits in the middle zone
- Kitchen and dining area near the entrance
Why it works: Natural traffic flow from public (kitchen) to private (bedroom). Guests never see your bed. The divider creates two distinct zones without blocking light.
Layout 2: The L-Shape (Best for Square Studios, 28+ m²)
Square studios are harder to zone than rectangular ones because there is no natural "front" and "back." The L-Shape solves this by tucking the bed into one corner and wrapping the living space around it in an L formation.
How it works:
- Bed goes in the corner furthest from the window
- Sofa placed perpendicular to the bed, creating an L-shape
- The sofa back acts as a visual divider between sleeping and living
- Dining table or desk goes near the window for natural light
Why it works: Uses the sofa itself as a room divider — no extra furniture needed. The bed corner feels enclosed and cozy. The L-shape naturally creates a living "room" that feels separate.
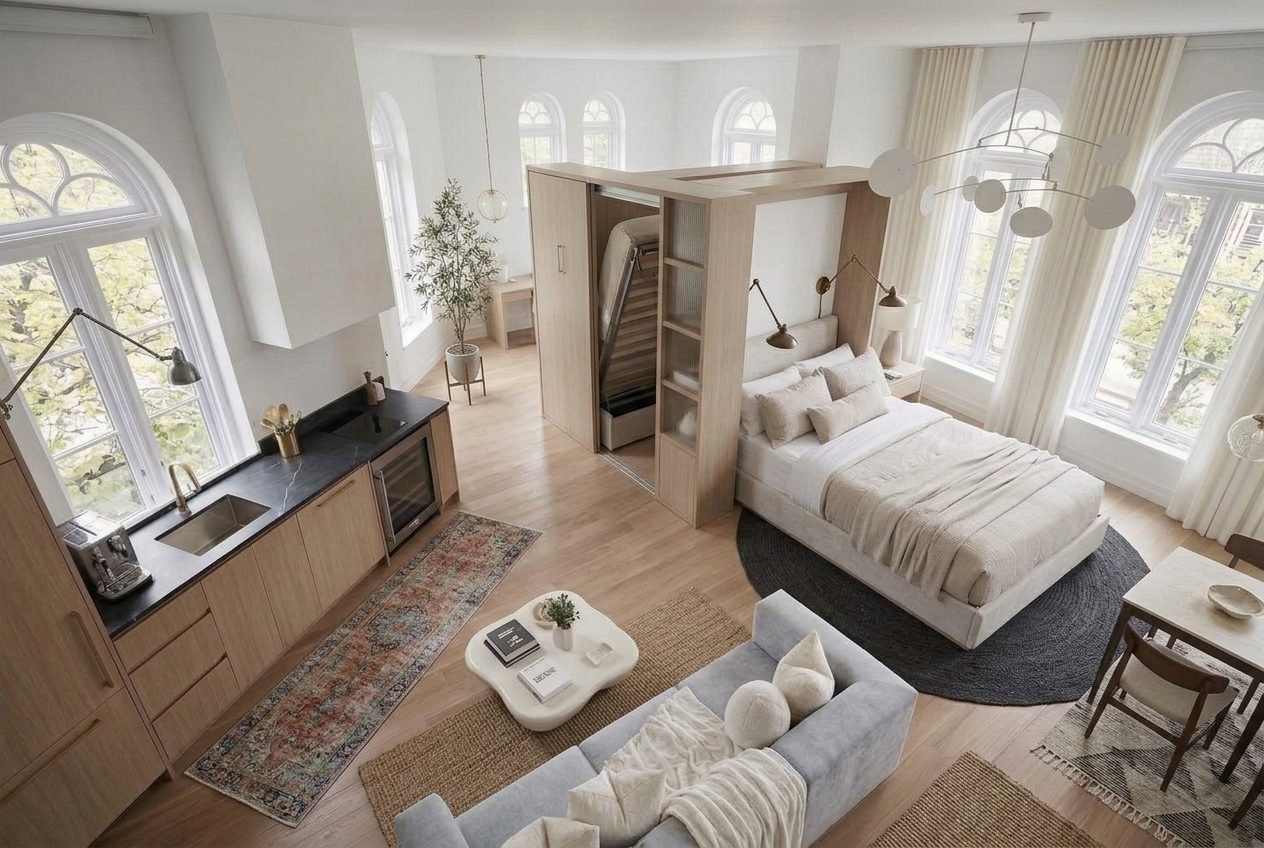
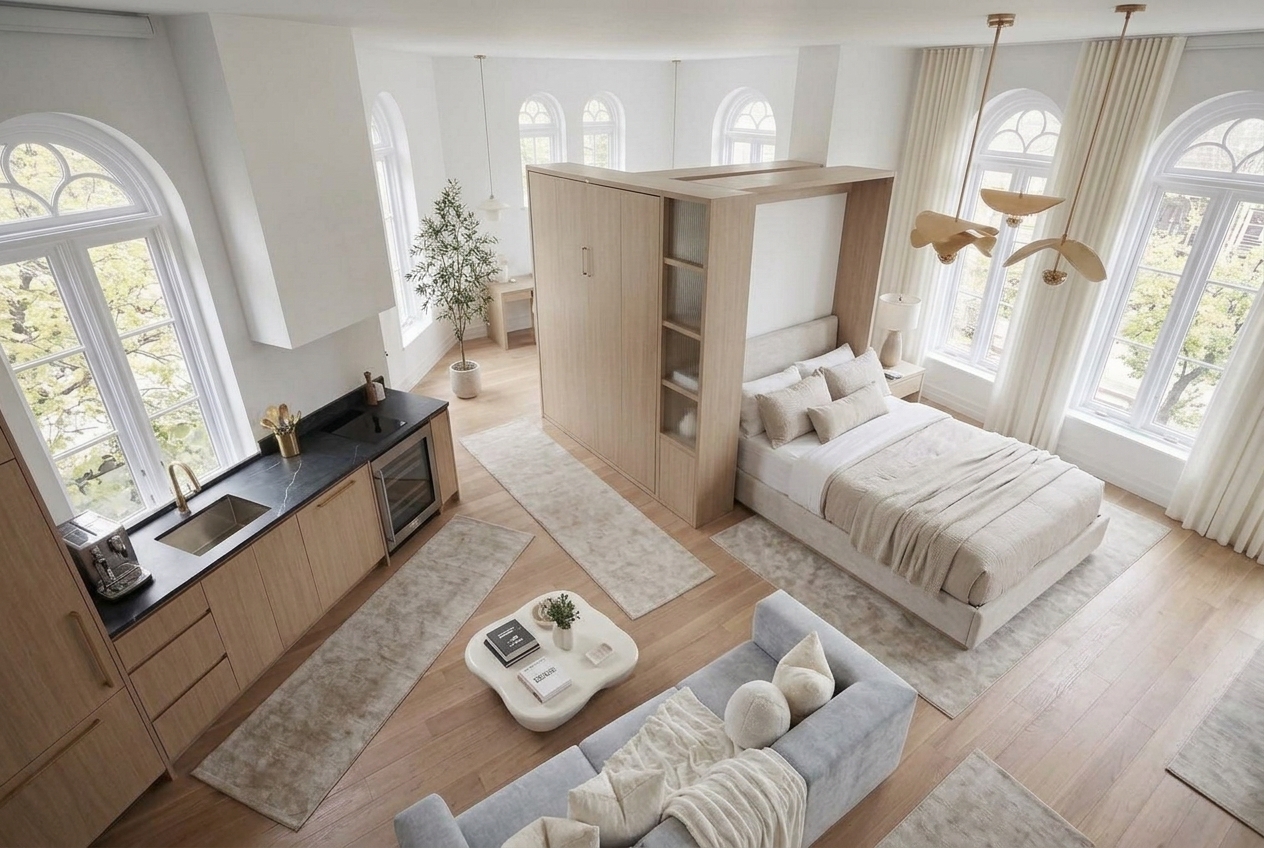
Layout 3: The Murphy Bed (Best for Micro Studios, 15+ m²)
When your studio is under 25 m², a permanent bed takes up too much floor space. AMurphy bed (wall bed) folds up during the day, giving you a full living room. At night, it folds down into a real bed — not a sofa bed compromise.
How it works:
- Murphy bed on the wall opposite the window
- When folded up: room becomes a living area with sofa, desk, or dining table
- When folded down: room becomes a bedroom with a proper mattress
- Side cabinets on either side of the Murphy bed for storage
Why it works: You effectively get two rooms from one. Modern Murphy beds have real mattresses (no more uncomfortable spring mechanisms) and can include shelving that stays accessible when the bed is down.
Layout 4: The Loft Bed (Best for High Ceilings, 18+ m²)
If your studio has ceilings above 3 meters, go vertical. A loft bed raises the sleeping area to the ceiling, freeing up the entire floor below for a living room, workspace, or walk-in closet.
How it works:
- Loft bed platform at 200-210 cm height (need 80+ cm clearance above mattress)
- Below the loft: desk, wardrobe, or a reading nook
- Remaining floor space becomes a full living area
- Ladder or built-in stairs for access
Why it works: Doubles your usable floor space. The bed is completely hidden from the living area. Popular in cities like New York, Paris, and Prague where old buildings have 3.5 m+ ceilings.
Layout 5: The Room Divider Wall (Best for Large Studios, 35+ m²)
If your studio is large enough (35+ m²), a half-height partition wall at 120-140 cm creates a genuine sense of separate rooms without the claustrophobia of a full wall. Light flows over the top, but sightlines to the bed are blocked when standing or sitting.
How it works:
- Build or install a partition wall (120-140 cm tall) to separate the sleeping zone
- The top of the wall doubles as a shelf or display ledge
- Bedroom side gets the bed, nightstand, and wardrobe
- Living side gets the sofa, TV, and coffee table
Why it works: Creates the feeling of a one-bedroom apartment while maintaining the openness and light of a studio. The partition can also hide cable management for a wall-mounted TV.
Layout 6: The Living Kitchen (Best for Social Studios, 30+ m²)
If you love cooking and hosting, make the kitchen island the center of your studio. The island acts as a bar, dining table, workspace, and room divider — all in one piece of furniture.
How it works:
- Kitchen island (or peninsula) positioned in the center of the space
- Kitchen behind the island, living area in front
- Bar stools on the living side for dining
- Bed in the back corner behind a curtain or bookshelf
Why it works: The island is the most multifunctional piece of furniture in any studio. It provides storage, a cooking surface, a dining area, and a visual boundary between kitchen and living space.
Layout 7: The Home Office Studio (Best for Remote Workers, 28+ m²)
Working from home in a studio is tough when your desk faces your bed. This layout creates a dedicated work zone that you can mentally "leave" at the end of the day.
How it works:
- Desk positioned near the window (best natural light for video calls)
- Bookshelf behind the desk chair creates a "wall" between work and living
- Sofa faces away from the desk — when you sit on the sofa, you cannot see work
- Bed in the opposite corner from the desk
Why it works: Physical separation between work and rest is critical for mental health. Even in a single room, turning your back on the desk and facing the living area creates a psychological transition.
Layout 8: The Minimalist (Best for Any Size, 20+ m²)
The minimalist approach says: do not fight the openness — embrace it. Instead of dividing the studio into zones, you treat the entire space as one harmonious room with fewer, better pieces of furniture.
How it works:
- Low platform bed (visually less dominant than a tall bed frame)
- No dividers — the bed is part of the room composition
- Floating shelves instead of bookcases (no visual weight)
- Neutral color palette with 1-2 accent colors
- Each piece of furniture earns its place — nothing decorative-only
Why it works: Fewer things = less clutter = the room feels bigger. This only works if you are genuinely disciplined about owning less. If you have a lot of stuff, choose a layout with more storage instead.
Layout 9: The Curtain Divide (Best for Renters, 22+ m²)
Renters cannot build partition walls. The ceiling-mounted curtain is the most popular renter-friendly studio hack: it creates a full-height room divider that costs under €50 and leaves zero damage when you move out.
How it works:
- Install a ceiling curtain track (IKEA VIDGA or similar) across the room
- Hang floor-length curtains (linen or cotton for breathability)
- Open during the day for full-studio feel
- Close at night for bedroom privacy
Why it works: Maximum flexibility at minimum cost. The curtain takes up zero floor space, can be opened or closed in seconds, and comes in every color and texture to match your style.
Layout 10: The Alcove Bed (Best for Studios with Nooks, 25+ m²)
Many older studios — especially in European cities — have architectural alcoves, niches, or L-shaped corners. If your studio has one, put the bed in it. The alcove becomes a natural bedroom that feels enclosed and private.
How it works:
- Bed slides into the alcove or nook
- Add a curtain or barn door across the alcove opening
- The main room becomes a pure living space — no bed visible
- Alcove walls can hold mounted shelves, reading lights, and art
Why it works: The architecture does the zoning for you. An alcove bed feels like a built-in sleeping pod — cozy and enclosed, like a hotel room within a studio.
Layout 11: The Daybed Dual (Best for Studio + Guest Room, 25+ m²)
If you want a studio that never looks like a bedroom during the day, a daybed is the answer. With bolster pillows, it looks like a sofa. Remove the pillows, and it is a full-size single or small double bed.
How it works:
- Daybed positioned where a sofa would normally go (against a wall or under a window)
- Bolster pillows and a throw transform it into a sofa during the day
- Coffee table in front for the living room feel
- A trundle drawer underneath pulls out for a second sleeping surface (guest bed)
Why it works: Your studio looks like a living room 100% of the time. No visitor will know they are looking at your bed. The trundle gives you a guest bed without any additional furniture.
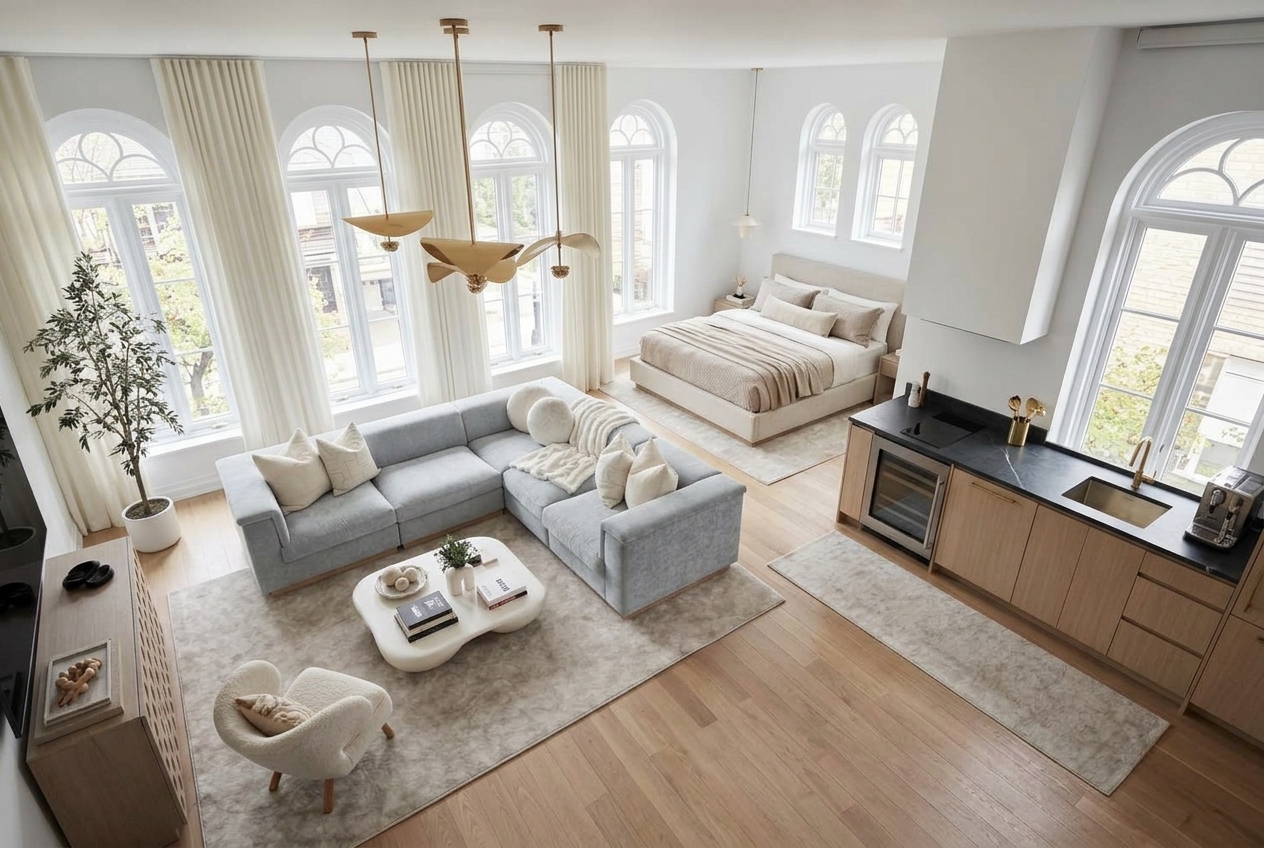
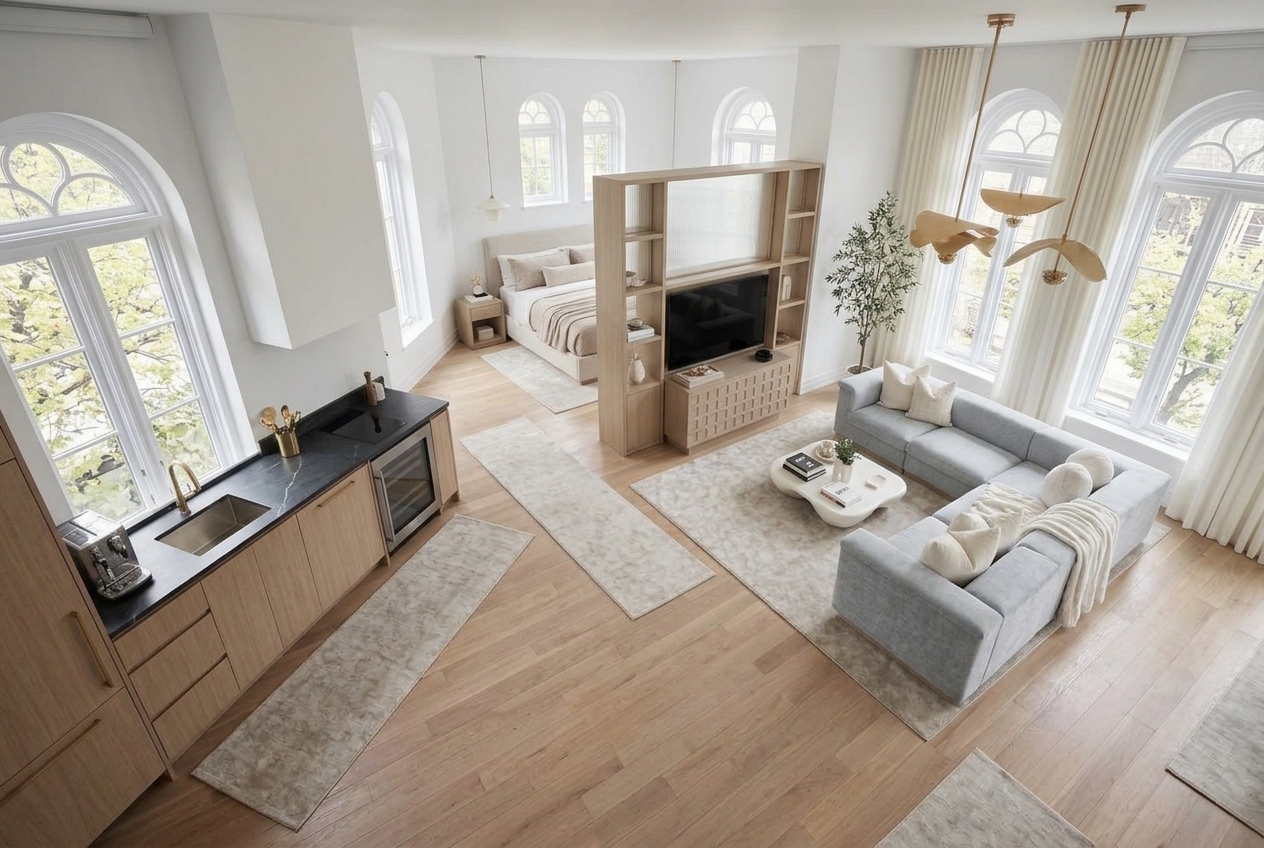
Layout 12: The Zoned Studio (Best for Large Studios, 40+ m²)
Large studios (40+ m²) have enough space for four distinct zones: sleeping, living, dining, and workspace. Instead of walls, you use rugs, lighting, and furniture groupings to define each area.
How it works:
- Each zone gets its own rug (different texture or color)
- Pendant lights or floor lamps mark each zone from above
- Furniture faces inward within each zone (sofa faces TV, desk faces wall, dining chairs face table)
- Walking paths between zones create natural boundaries
Why it works: Four rugs and four light sources cost less than one partition wall — and they create stronger visual separation. Each zone has its own atmosphere while the studio still feels open and connected.
Space-Saving Furniture for Studio Apartments
In a studio, every piece of furniture should serve at least two purposes. Here are the most effective space-savers:
Multifunctional Must-Haves
- Storage bed with drawers: Eliminates the need for a separate dresser. A bed with 4-6 drawers underneath stores an entire wardrobe season.
- Extendable dining table: Seats 2 daily, extends to seat 4-6 for dinner guests. Look for tables under 80 cm wide in compact mode.
- Wall-mounted drop-leaf desk: Folds flat against the wall when not in use. Opens to a full workspace in seconds. Zero floor space when closed.
- Ottoman with storage: Acts as a coffee table, extra seating, footrest, and blanket/pillow storage. The most versatile piece in any studio.
- Nesting tables: Stack into one when you need floor space, spread into 2-3 side tables when you have guests.
Furniture to Avoid in Studios
- Full-size sofas (200+ cm): Choose an apartment-size sofa (150-180 cm) or a loveseat instead.
- Bulky entertainment centers: Wall-mount your TV and use a floating shelf instead.
- Oversized coffee tables: Choose a small round table (60 cm) or nesting tables.
- Standalone wardrobes in the living area: Use a clothing rack behind a curtain or build-in closet if possible.
- Queen-size bed in studios under 35 m²: A full-size (140 cm) bed saves 15 cm of width — in a studio, those centimeters matter.
Studio Apartment Zoning: How to Create Rooms Without Walls
Zoning is the single most important concept in studio design. Here are the techniques professional designers use:
1. Rug Zoning
Place a rug under each functional area. A rug under the bed defines the sleeping zone. A different rug under the sofa and coffee table defines the living zone. The edge of each rug is a visual boundary. Choose rugs with different textures but complementary colors so the studio still feels cohesive.
2. Light Zoning
Each zone gets its own light source: a pendant light over the dining table, a floor lamp next to the sofa, a table lamp on the nightstand, a desk lamp on the workspace. At night, you can light just one zone at a time, making the others visually disappear. This is the cheapest and most effective way to create "rooms" in a studio.
3. Elevation Zoning
Raising the bed area by 15-20 cm on a low platform creates an instant sense of a separate room. The step up physically and psychologically marks the transition from living space to sleeping space. Bonus: the platform can hide storage drawers.
4. Color Zoning
Paint one wall behind the bed in a different color (a bedroom accent wall). The color change signals "this is the bedroom" without any physical divider. Works especially well with deep, warm tones (navy, forest green, terracotta) that feel cozy and enclosed for sleeping.
How to Plan Your Studio Layout with AI (Free)
Measuring your studio with a tape measure and imagining where furniture fits is unreliable. You cannot visualize proportions in your head — a sofa that looks small in a showroom might overwhelm your studio.
MeltFlex solves this. Upload your studio floor plan — whether it is an architect drawing, a hand sketch, or a photo from a real estate listing — and the AI converts it into an interactive 3D model in seconds.
Step 1: Upload Your Studio Floor Plan
Take a photo of your studio floor plan or draw one by hand. The AI identifies walls, doors, windows, and the kitchen area automatically. Even rough sketches work — the AI corrects proportions and straightens walls.
Step 2: Place Furniture at Real Scale
Browse a catalog of real furniture from real brands with exact dimensions and pricing. Drag a sofa into your studio and see immediately whether it fits. Try a 180 cm sofa, then swap it for a 150 cm one. Move the bed to different positions. Test every layout from this guide in minutes instead of hours.
Step 3: Generate a Photorealistic Render
Once your layout is set, generate an AI render to see exactly how your studio will look — with textures, lighting, and shadows. Try different styles: Scandinavian, minimalist, industrial, or modern. See the result before you buy a single piece of furniture.
Upload your studio floor plan and design it in 3D — free →
Studio Apartment Color Palettes That Work
Color has an outsized effect in studios because you see every wall from every angle. The wrong color makes the space feel smaller. These palettes are tested in small spaces:
- Warm white + oak + sage green: The Scandinavian classic. Walls in warm white (not cold white), oak furniture, sage green textiles. Feels clean and airy without being sterile.
- Light gray + walnut + mustard: More character than all-white. Light gray walls, walnut furniture, mustard accent pillows and throws. Mid-century modern vibe.
- Off-white + black accents + natural linen: High contrast without color. Black-framed furniture, black light fixtures, natural linen on the bed and sofa. Sophisticated and Instagram-ready.
- Navy accent wall + white + brass: Paint one wall (behind the bed) navy. Everything else white. Brass handles, lamp, and frame. The navy wall anchors the sleeping zone and adds depth.
For more on choosing paint colors, see our paint color guide with AI visualization.
Studio Apartment Storage Hacks
Storage is the #1 challenge in studio living. Here is where to find hidden square meters:
- Above the door: Install a shelf above every doorway. It is dead space that fits boxes, books, or baskets.
- Under the bed: Storage beds with drawers or vacuum bags under a platform bed can hold an entire season of clothes.
- Behind the sofa: A narrow console table (20-25 cm deep) behind the sofa holds books, remotes, and chargers without taking visible space.
- Inside the staircase: If you have a loft bed with stairs (not a ladder), each step can be a pull-out drawer.
- Vertical walls: Pegboard walls, magnetic knife strips in the kitchen, and floating shelves to the ceiling keep everything off the floor.
- The bathroom: Over-toilet shelving, magnetic spice jars on the mirror wall, and a shower caddy reclaim space from the only separate room in your studio.
5 Studio Design Mistakes to Avoid
- Pushing all furniture against the walls: This leaves a dead void in the center and makes the room feel like a waiting room. Pull furniture away from walls — even 10 cm creates a sense of depth.
- Too many small pieces: Five small tables create more visual clutter than one good-sized one. Choose fewer, appropriately-scaled pieces.
- Ignoring vertical space: In a studio, walls are your storage. If you only use floor space, you will run out immediately. Build up, not out.
- No defined zones: A studio without zones is just a room with a bed in it. Use at least one zoning technique (rug, lighting, divider) to create distinct areas.
- Buying furniture without measuring: The #1 most expensive studio mistake. A sofa that is 10 cm too wide blocks a doorway, a bed that is too long hits the radiator. Measure everything, or better — plan it in 3D first.
Real Studio Apartment Transformation
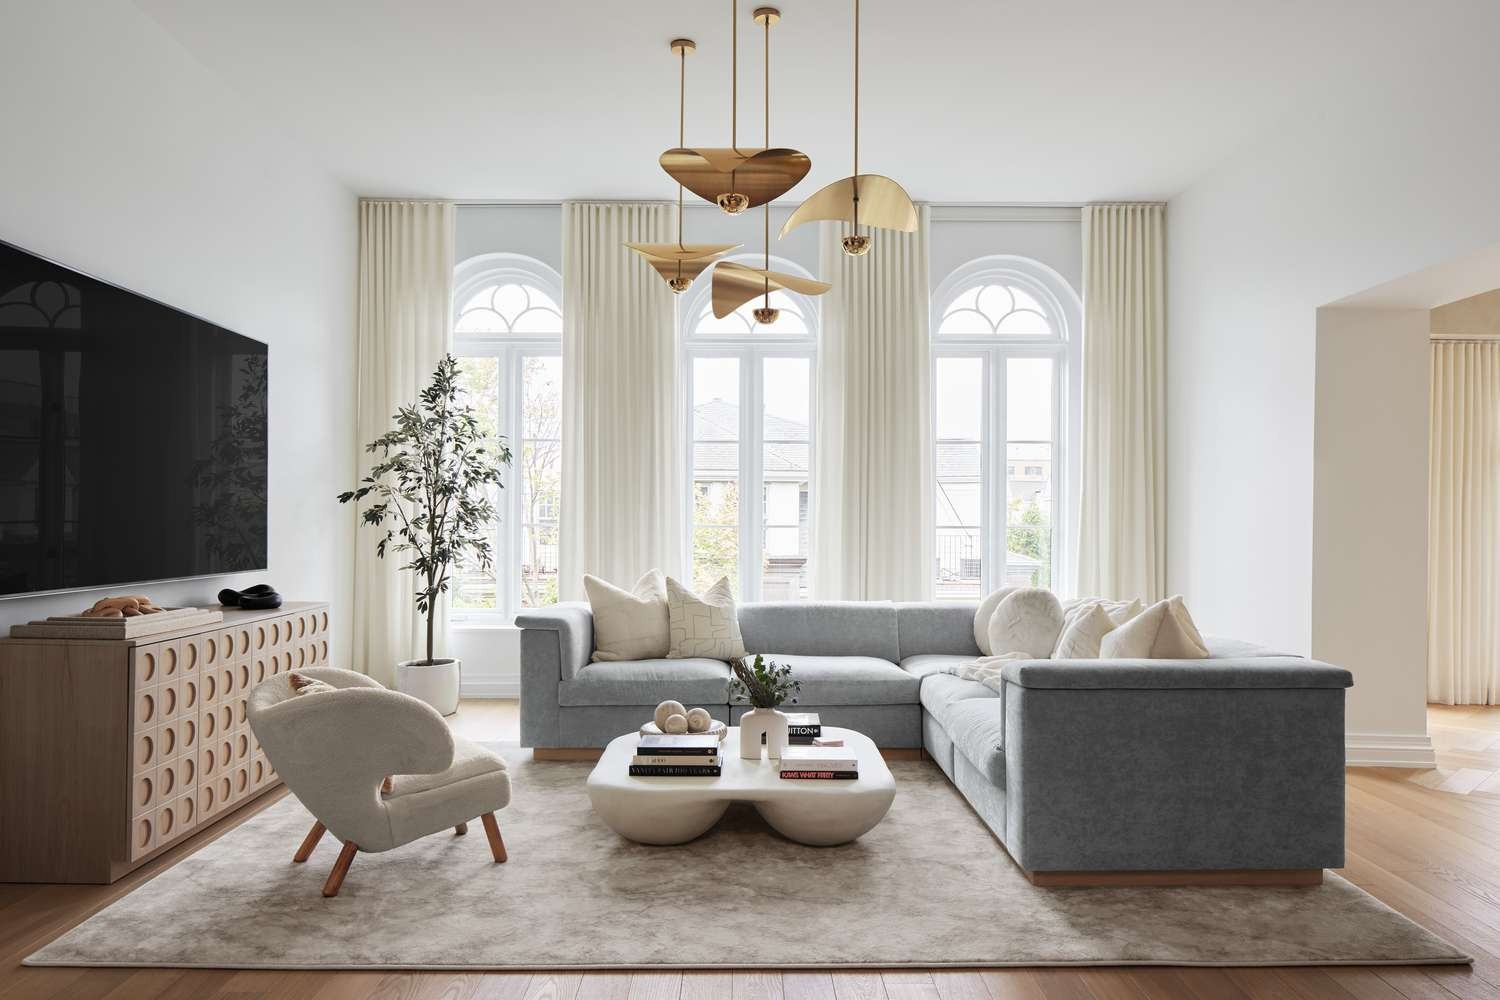
The layouts shown throughout this guide demonstrate how the same studio space can be transformed with different furniture arrangements — from a bookshelf divider creating distinct zones, to an open L-shape layout that maximizes the feeling of spaciousness. The studio did not get bigger, but intentional layout gives it four functional zones. Every piece of furniture serves a purpose, and the sight lines are designed so you cannot see the bed from the sofa.
Studio Apartment Design Checklist
Use this checklist before you finalize your studio layout:
- Can you walk from the entrance to every zone without squeezing past furniture?
- Is the bed hidden or separated from the main living area?
- Does every piece of furniture serve at least one function beyond decoration?
- Do you have at least one dedicated storage solution in each zone?
- Have you tested the layout at real scale (in a 3D planner or with painter's tape on the floor)?
- Is there natural light reaching all zones (no tall furniture blocking windows)?
- Do you have separate light sources for each zone (not just one ceiling light)?
Plan Your Studio Apartment Today
A studio apartment is not a limitation — it is a design puzzle with a satisfying solution. The right layout transforms a single room into a multi-functional home that feels spacious, organized, and personal.
Start by uploading your studio floor plan to MeltFlex. See your space in 3D, try the layouts from this guide, place real furniture at exact scale, and generate photorealistic renders — all for free. Make every decision before you spend a single euro.
Design your studio apartment in 3D — free →
Related guides: furnish an empty apartment with AI, small living room ideas, new-build apartment design, 8 interior design styles guide, and how to choose paint colors.