Quick verdict: "Free floor plan to 3D converter" covers three different kinds of tool, and most of the confusion comes from mixing them up. Some read your plan and hand back a furnished 3D picture (MeltFlex, Edensign, Floor-plan.ai, Dehome). Some give you a 3D model file you can download (floorplanmaker.ai, MeltFlex, ArchyBase). The rest are editors where you trace the plan yourself (Cedreo, Arcadium 3D, Floorplanner, HomeByMe, SketchUp). We checked all 13 on their own pages on 29 September 2026 and ran a real US floor plan through MeltFlex, with every output shown below. The short answer to can AI turn a floor plan into a 3D model is yes, in under a minute. The useful answer is which of the three kinds you need.
Our articles are still written by humans!
Get human written articles in your Google feed.
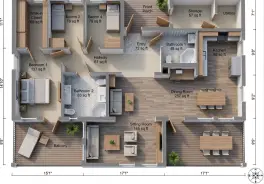
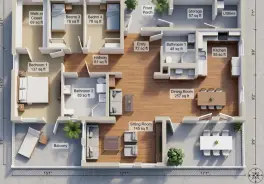
The Best Free Floor Plan to 3D Tool for Each Job
- A furnished 3D picture of your plan: MeltFlex (six output styles, one free render), Edensign (first 2 plans free) or Floor-plan.ai.
- A 3D model file you can download: floorplanmaker.ai (no account, empty shell) or MeltFlex (GLB, 100 credits on a paid plan).
- A model you keep editing room by room: Coohom or Homestyler on their free plans, Planner 5D if you pay for Premium, which is where its AI upload lives.
- Full precision, drawn by you: SketchUp Free, Cedreo, Arcadium 3D, Floorplanner or HomeByMe. None of them reads the plan for you.
All 13 Floor Plan to 3D Tools Compared
"Reads your plan" means the tool finds the walls itself. "Trace" means the plan is only a background and you draw the walls over it. Prices are the cheapest paid option each vendor listed on 29 September 2026. Several pages showed us euros, so your local price may differ.
Read the table by the second column first. Most of these tools show up in Google for "convert floor plan to 3D", yet five of the 13 never convert anything: they give you a 3D editor with your plan as a tracing layer. That is a good workflow if you want precision and have an evening. It is not what most people mean by a converter. And among the tools that do read the plan, the split is between a picture (fast, furnished, not editable) and a model (editable, usually empty).
How We Checked, and What We Did Not Test
Two different kinds of evidence sit on this page, and it is worth being clear which is which.
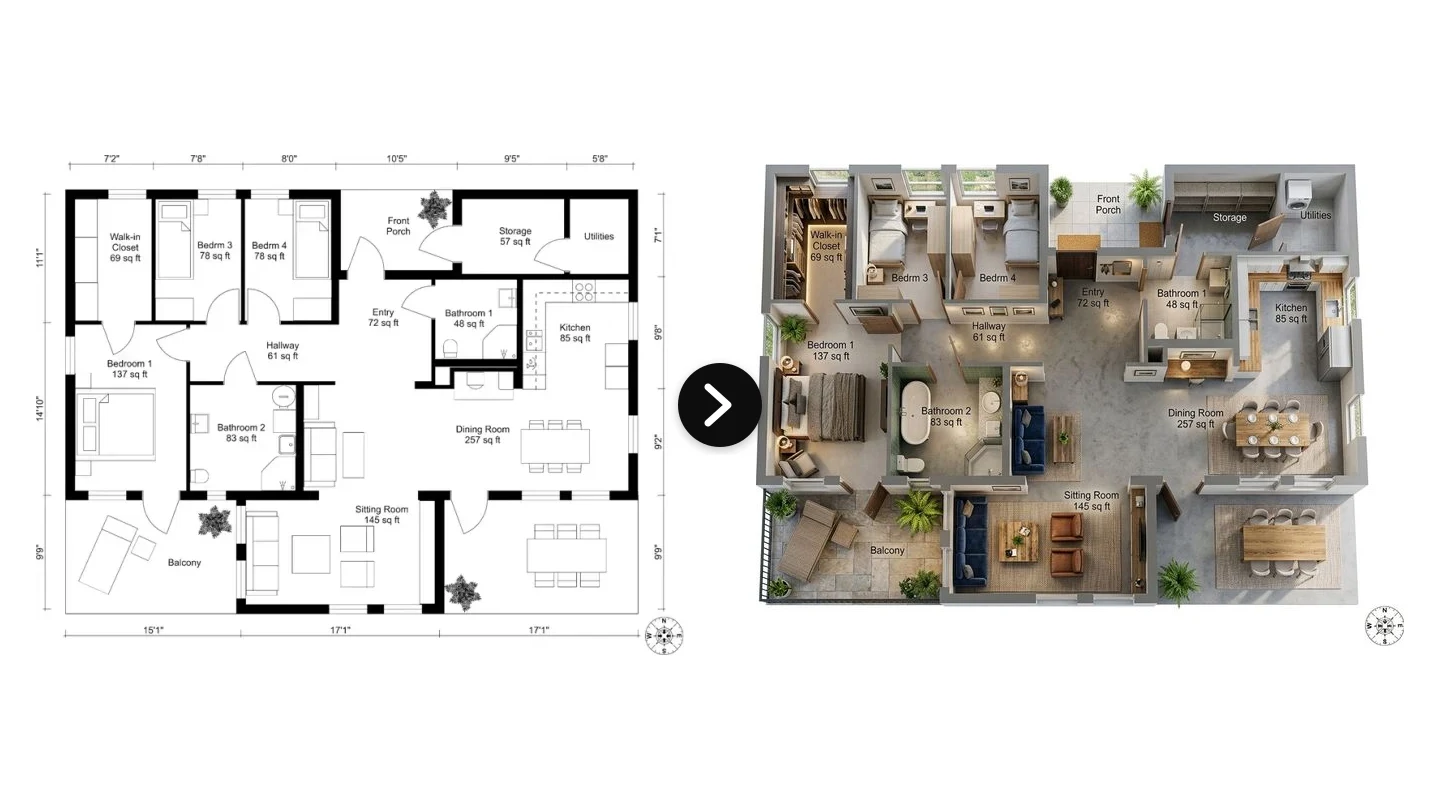
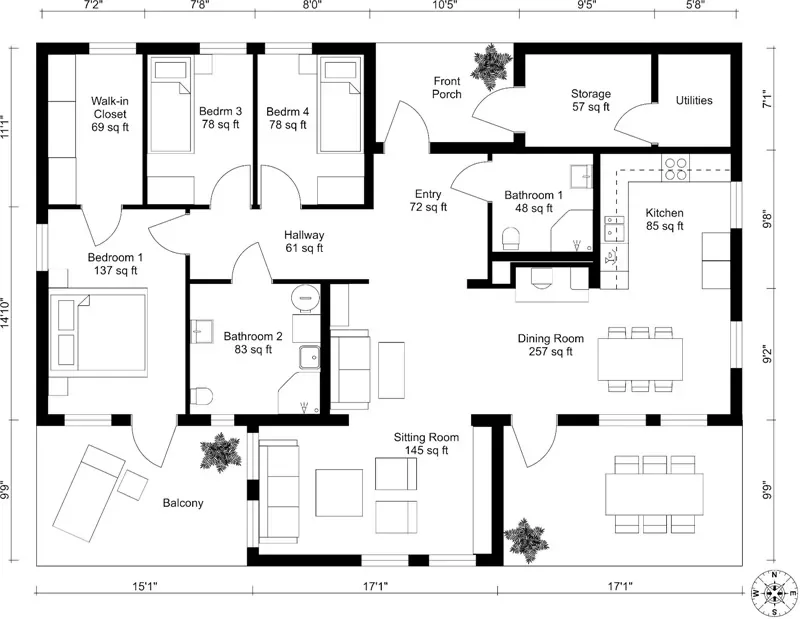
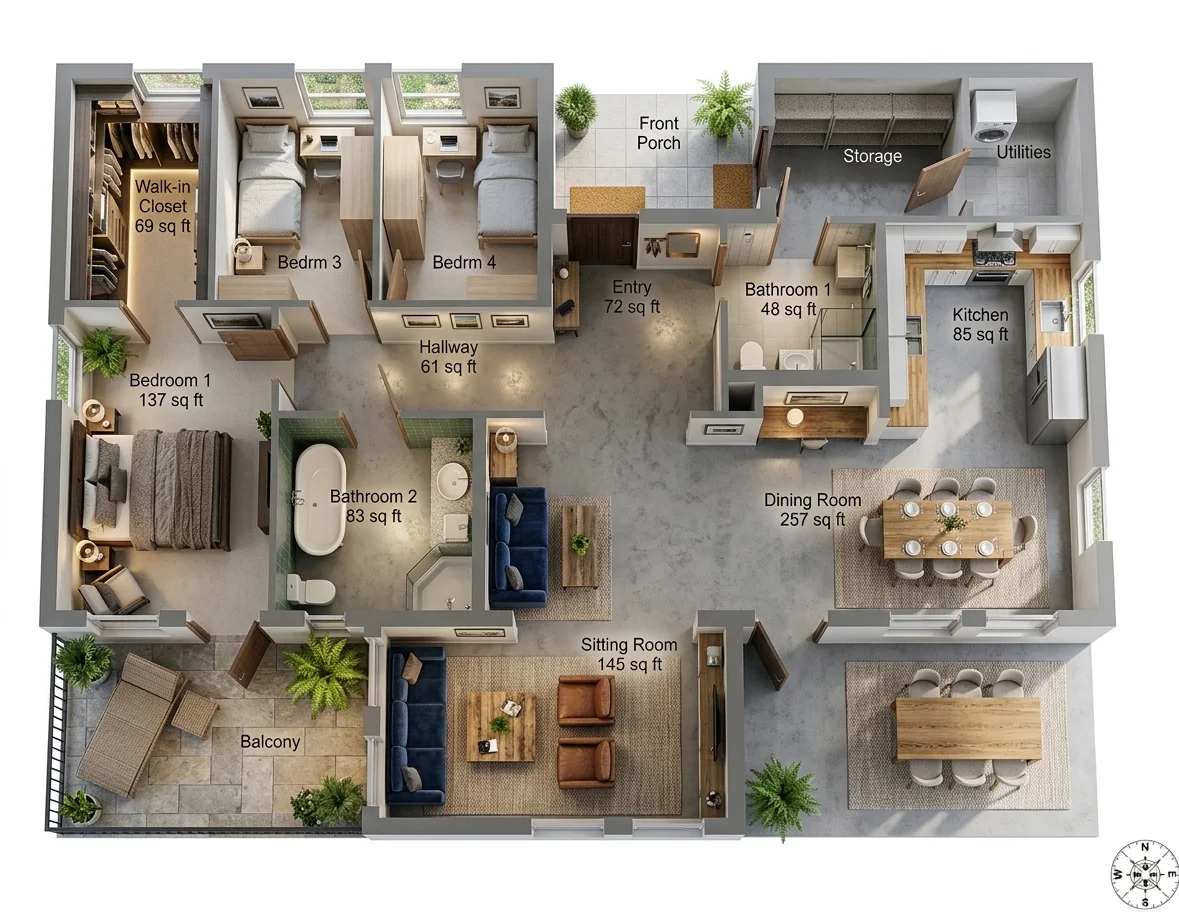
- MeltFlex, run on a real plan. Every MeltFlex image below comes from one US ranch plan in feet and inches: a four-bedroom, two-bath layout with a walk-in closet, a 257 sq ft dining room and a balcony. We show the outputs as they came back, including where they are wrong.
- The other 12, checked on their own pages. On 29 September 2026 we read each vendor's tool page, pricing page and help docs, without creating accounts, and recorded what the free tier gives, what the tool returns and whether it reads the plan or makes you trace it. Where a vendor does not publish something, the table says so rather than guessing.
We make MeltFlex, so weigh our verdict on it accordingly. That is why its section lists what went wrong in our own run, and why the table gives competitors credit where their tools do something ours does not, like floorplanmaker.ai working with no account at all.
1. MeltFlex: A Furnished 3D Render in Six Styles, Plus a Model File
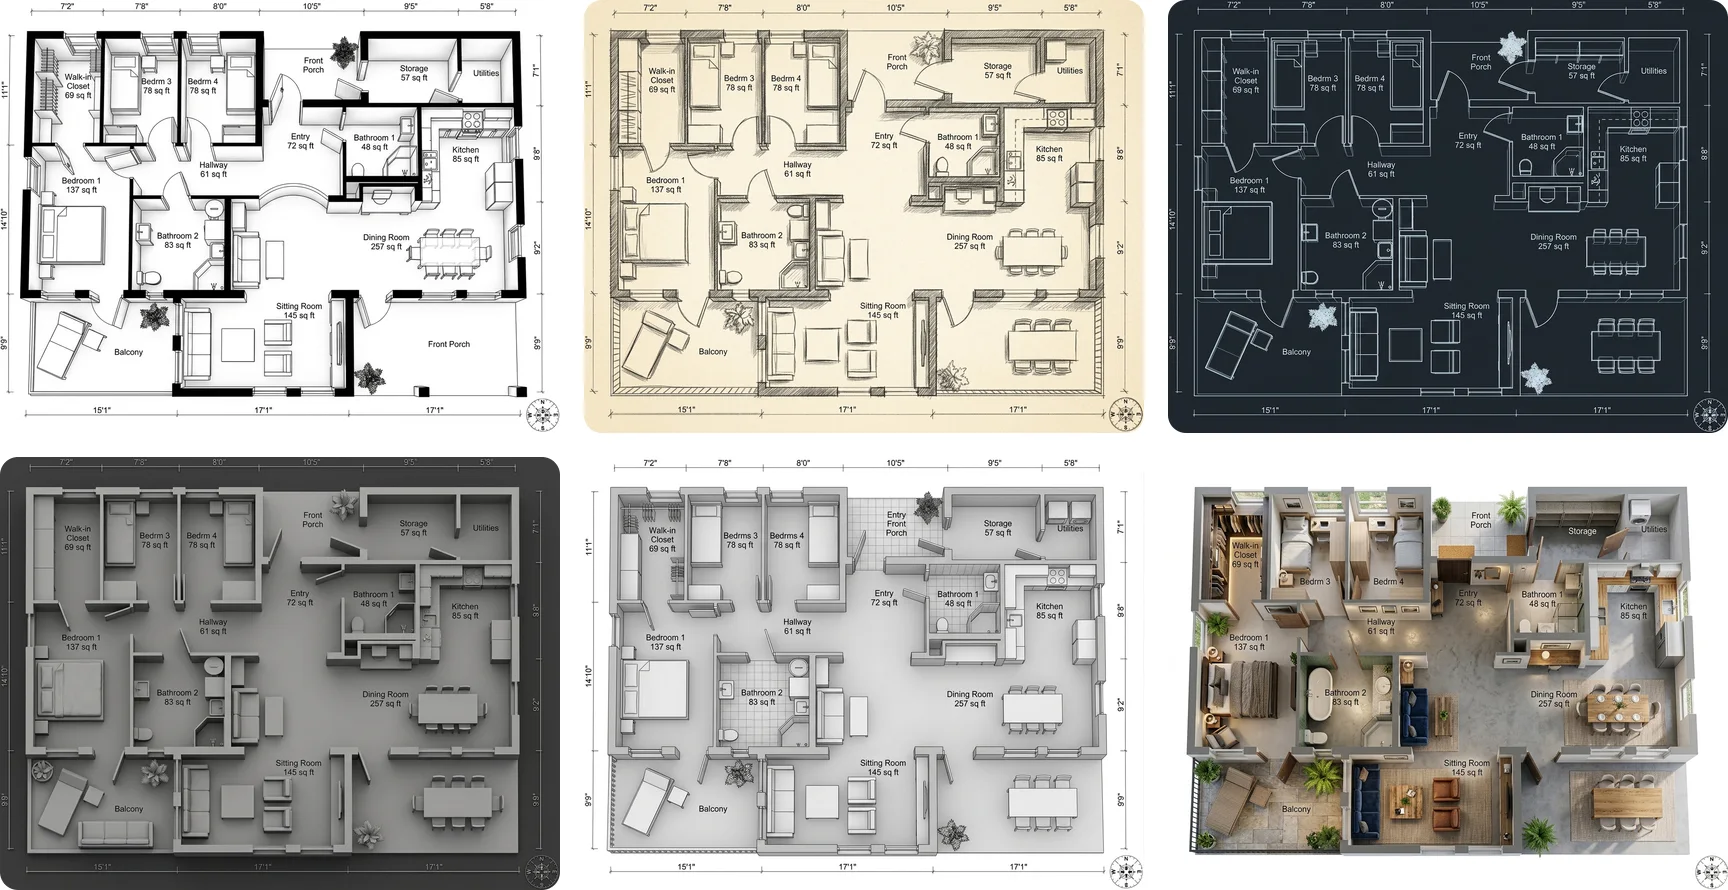
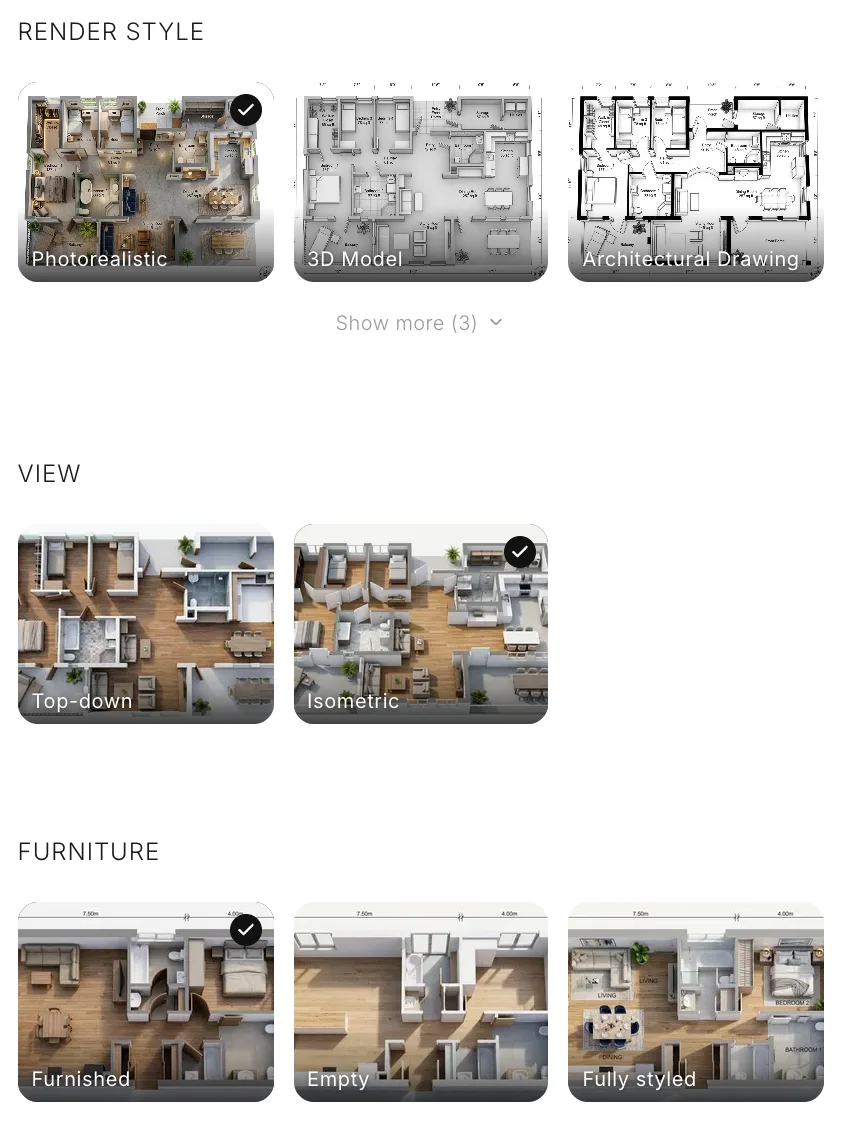
You upload an image of the plan, pick four things (render style, view, furniture and interior style) and get a 3D picture of the whole plan back in roughly 20 to 30 seconds. A render costs 10 credits, so the 15 you get at signup cover exactly one. From the same upload you can also ask for a downloadable GLB model, which takes two to three minutes and costs 100 credits, so it needs a paid plan.
What It Got Right, and What It Invented
Put the plan and the photorealistic render side by side and check it the way you would check any render: room by room, opening by opening.
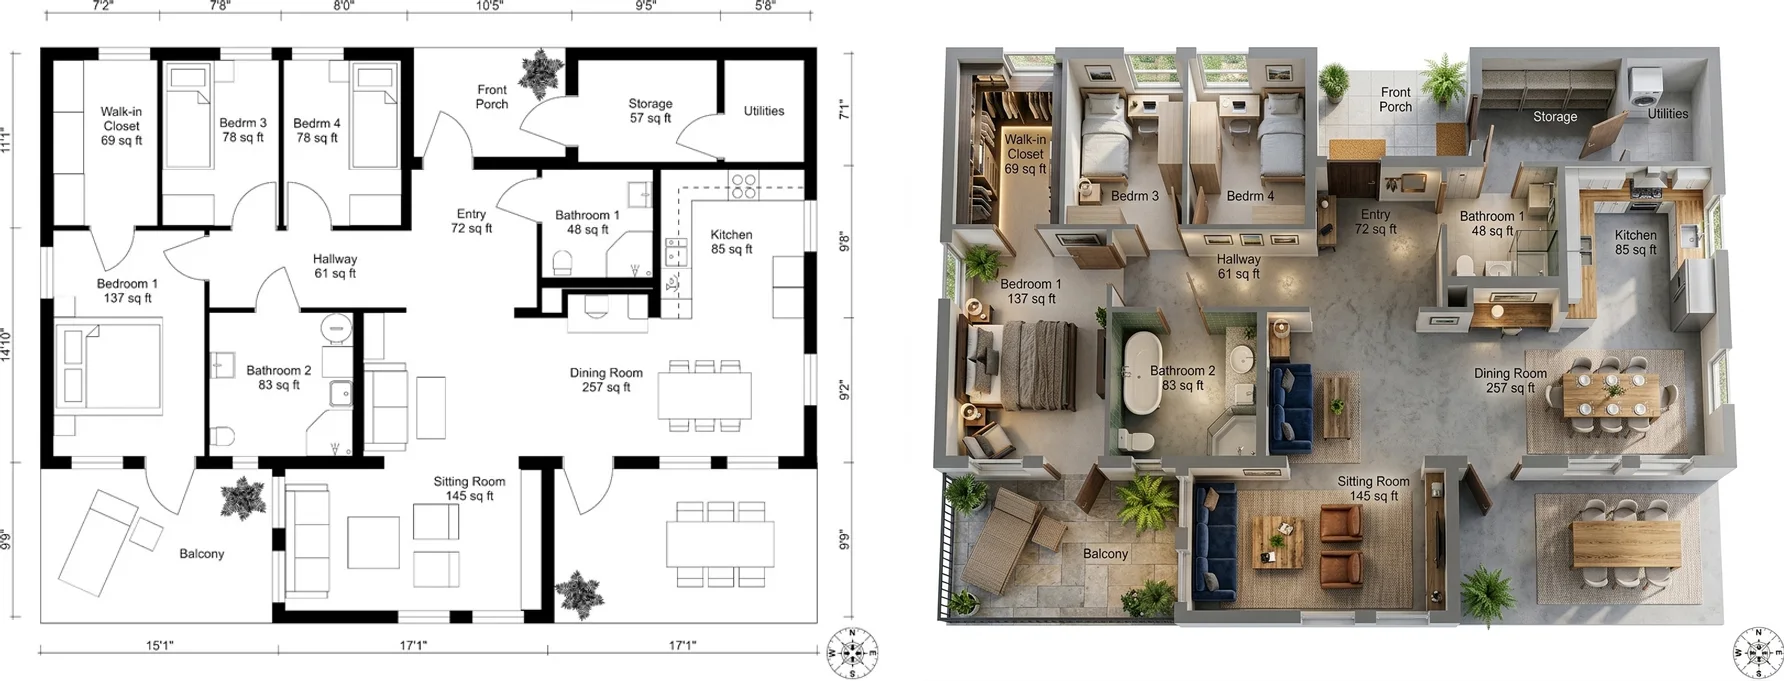
- Kept: every room in its place, every room label and its square footage, the walk-in closet, both bathrooms, the kitchen run and the balcony. The bedroom and bath doors open where the plan puts them.
- Invented: Bathroom 2 gained a freestanding tub. The plan shows a sink, a toilet and a corner shower. The render kept the shower and added the tub anyway.
- Dropped: the dimension strings along the edges of the sheet. The room areas survive as labels, but you cannot read wall lengths off the render.
- Guessed, as every tool must: floor finishes, the furniture layout and the planting. None of that is on the plan.
The GLB model is rougher than the render. Walls come out slightly uneven, and the model added railings around the balcony and porch that the plan does not draw. It is good for orbiting the layout and checking how rooms connect, not for measuring. You can see it in the render vs model comparison below.
Pros of MeltFlex
- One upload gives both a furnished render and a downloadable GLB model. ArchyBase's page promises the same pair; we could not confirm it without an account.
- Six render styles, two views (top-down or isometric), three furniture levels (empty, furnished, fully styled) and eight interior styles plus Auto, all as picture cards rather than a prompt box.
- Room labels and square footage carry over into the render.
- The render opens in the same workspace as MeltFlex's room photo tools, so you can go from the plan to redesigning the real rooms without starting over.
Cons of MeltFlex
- The free signup credits cover one render, and the 3D model file is not included on the free credits.
- It takes images only: a PDF has to be exported to JPG or PNG first, and DWG files are not read.
- The render is a picture. To move a wall you convert again, or take the GLB into another 3D program.
- Like every AI render, it invents details the plan does not specify, such as the tub in our test.
Best for: homeowners, renters and agents who want to see a plan furnished today. Convert your own floor plan with MeltFlex and check the result against your plan the same way.
2. Planner 5D: Best for Editing the Layout Yourself
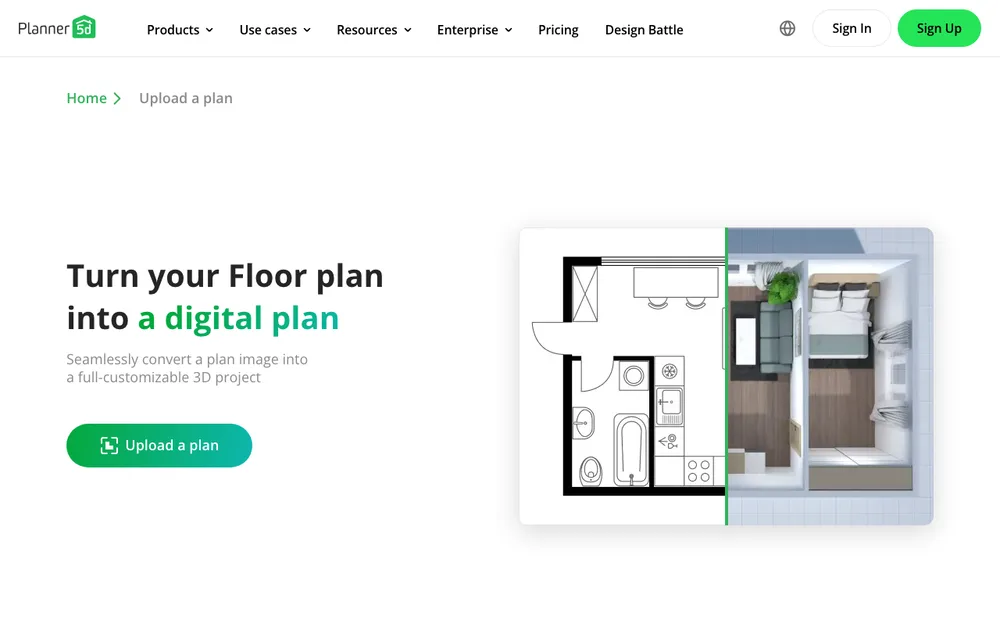
Planner 5D reads an uploaded plan and turns it into an editable 3D project with a large drag-and-drop catalog. The catch is on the pricing page: the free plan says outright that it has no AI floor plan recognition. The upload-to-3D feature sits on Premium, listed at 59.99 a year or 19.99 month to month when we checked. On the plus side, it takes the widest range of files of any tool here, including PDF, DWG and DXF.
Pros: editable result, big catalog, reads CAD files. Cons: the AI conversion is paid, and you furnish every room by hand. Best for: people who want to keep reworking the layout after the conversion.
3. Coohom: Best Free Editor That Can Read Your Plan

Coohom runs in the browser and, according to its help center, lets you either auto-recognize an uploaded plan or trace it. It accepts JPG, PNG, PDF, DWG and DXF, and its renders are among the strongest of the editors. There is a free Basic plan; its exact limits are not published on the page, and paid plans start at $29.
Pros: reads plans and CAD files for free, strong renders. Cons: a real learning curve, and furnishing is manual. Best for: people willing to learn a proper tool in exchange for control.
The Other Tools That Read Your Plan
4. Floor-plan.ai: Furnished Renders on a Monthly Plan

Floor-plan.ai holds the top organic spot for most floor plan to 3D searches. It takes almost any image format plus PDF and returns furnished render images, not an editable model. Signup is through Google, the first credits are free with no card, and the Starter plan is $9.99 a month or $119 a year for 200 credits.
5. Edensign: The Most Generous Free Tier
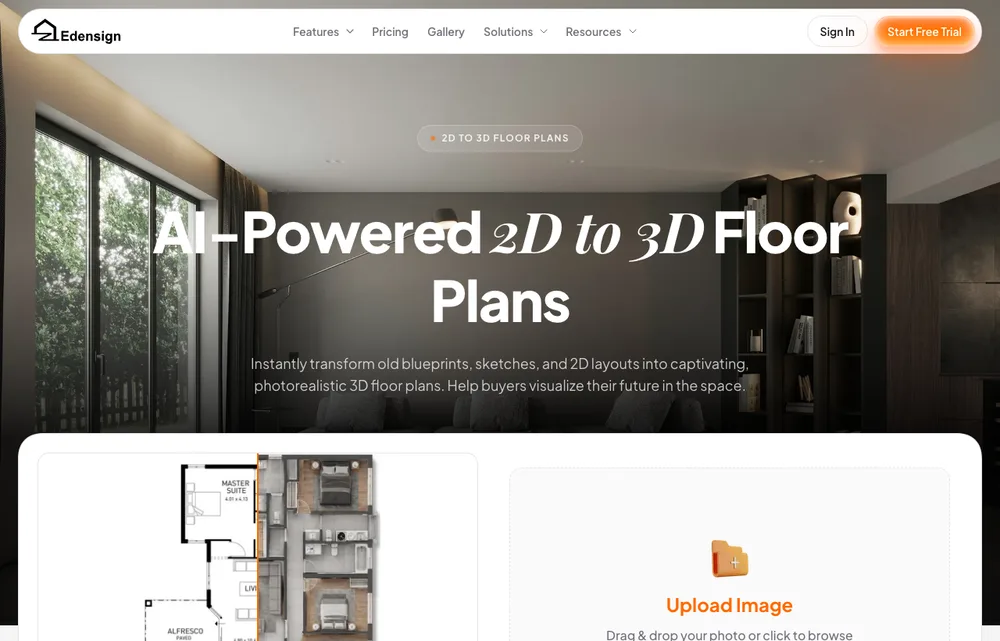
Edensign converts your first two plans free with no card, furnishes them by style in about ten seconds and does not watermark any tier. It accepts hand-drawn plans and scans as well as PDF. The output is a render image. Paid starts at $20 a month.
6. Dehome.ai: One Free Conversion, Then Credit Packs
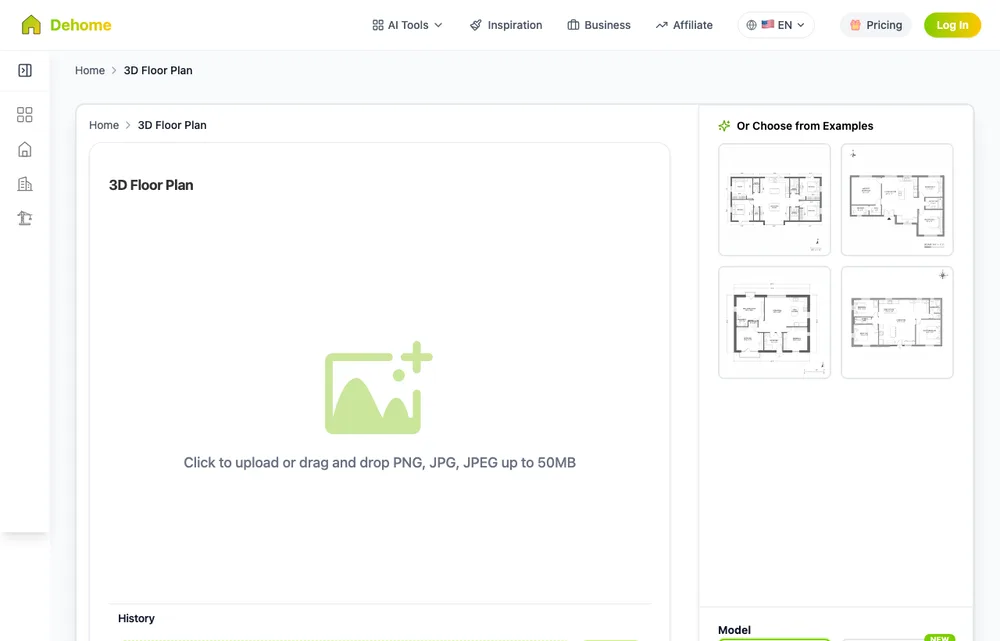
Dehome gives 4 free credits and a conversion costs 4, so you get exactly one. After that it sells credit packs that never expire, from $9.99 for 180 credits, rather than a subscription. You get back a furnished render image.
7. ArchyBase: Renders, and a Model File on Paper
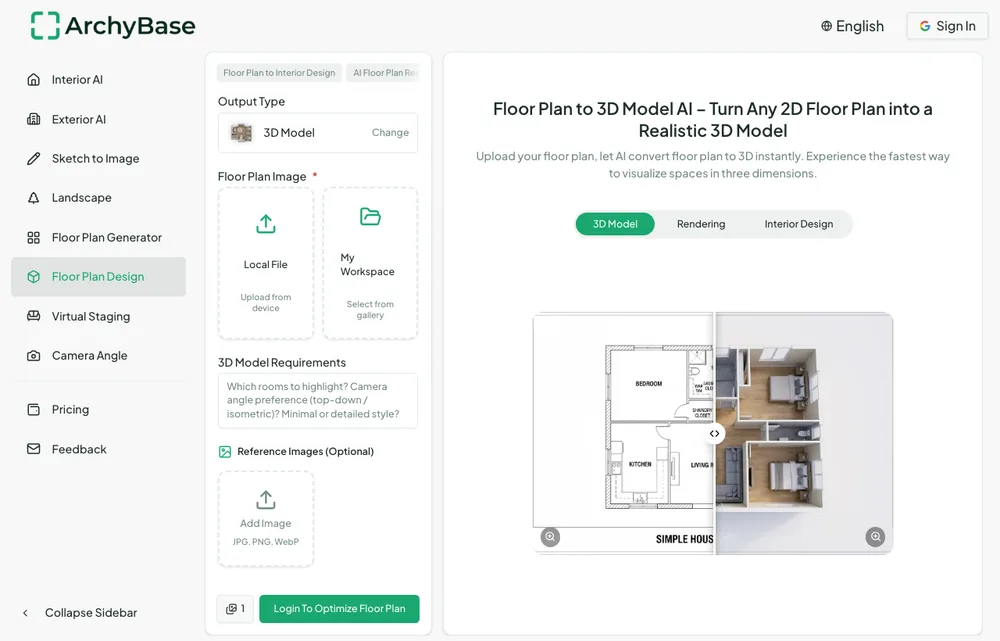
ArchyBase gives two free generations at full resolution with no watermark and furnishes rooms by their function. Its page also promises OBJ and GLB downloads and a 3D walkthrough, which we could not confirm without an account. Paid is $15.92 a month billed yearly.
8. floorplanmaker.ai: The Only One With No Account
floorplanmaker.ai is the only converter we found that says you can use it without signing up. It takes PNG, JPG or WEBP and returns an editable GLB model, empty, with no furniture. It publishes no pricing page, so the free limits are unknown. If you only want a quick 3D shell of a plan and no account, start here.
9. Homestyler: Auto Generate, With One Odd Requirement
Homestyler's Auto Generate builds an editable 3D model from an uploaded plan, but you enter the total area first, and in square meters only. It assigns room types without furnishing them. The free Basic plan gives unlimited 1K renders with a watermark; whether Auto Generate is included on it is not stated. Paid starts from about $4.90 a month.
The Tools Where You Trace the Plan Yourself
These five appear in the same search results, and some of their pages use the word "convert". What they mean is that the 3D view builds live while you draw the walls over your uploaded plan. That is accurate and controllable, and it is manual work.
10. Cedreo: For Builders and Remodelers
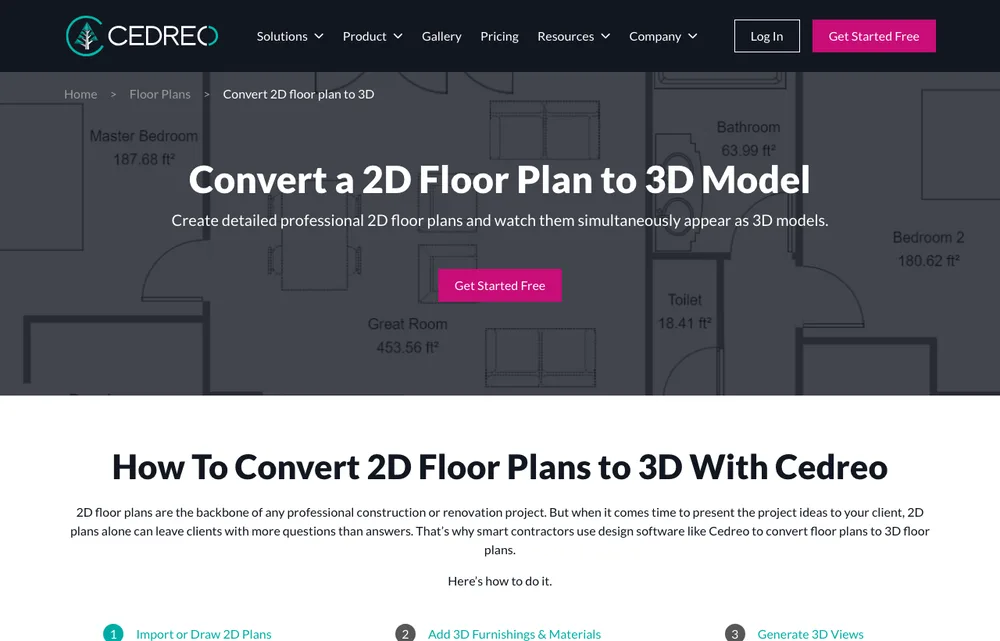
Cedreo's own page says its drawing engine is not AI-based: you trace the plan (PDF, PNG, DWG or DXF as an underlay) and the 3D follows. The free plan covers one project and five watermarked renders for personal use. Built for builders presenting to clients.
11. Arcadium 3D
Arcadium 3D takes a PDF, JPG or PNG as a tracing layer. The free plan allows two projects with up to 30 objects each, and it exports GLB, OBJ and STL. Pro is €16 a month billed yearly.
12. Floorplanner and HomeByMe
Both put your plan in as a backdrop to draw over. Floorplanner's free tier gives five projects and watermarked SD images, with credits from $8.15. HomeByMe's free Starter plan gives two projects and five Full HD images, and it also sells a separate service where they draw the plan for you, limited to one floor under 2,690 sq ft.
13. SketchUp Free: Full Control, Full Effort
SketchUp Free is a real 3D modeler, not a converter. You import the plan as a JPG or PNG (the free version does not import PDF or DWG) and model the walls yourself. The ceiling on quality is the highest here, and so is the time it takes. Go costs $10.75 a month billed yearly.
How AI Reads a Floor Plan, and Where It Guesses
The tools that read your plan all run roughly the same three steps. Knowing them tells you why one plan converts cleanly and the next comes out with a wall missing.
1. It Finds the Walls
The model looks at the plan as an image and picks out walls, doorways, windows and room boundaries from the line work, then works out which space is which from size, shape, fixtures and labels. This is the step that fails on a blurry photo or a faint scan: if it cannot see the line, it cannot build the wall.
2. It Builds the Geometry
Walls are raised to a ceiling height with a sensible thickness, and openings are cut where the plan shows them. The positions come straight off your drawing, which is why the layout is the most reliable part of any output.
3. It Guesses the Third Dimension
A 2D plan does not contain ceiling height, sill height, floor finishes or furniture. The AI fills those in from what homes usually look like. That is why these outputs are excellent for layout and proportion and why you should never hand one to a builder. It is also where our own test added a tub nobody drew.
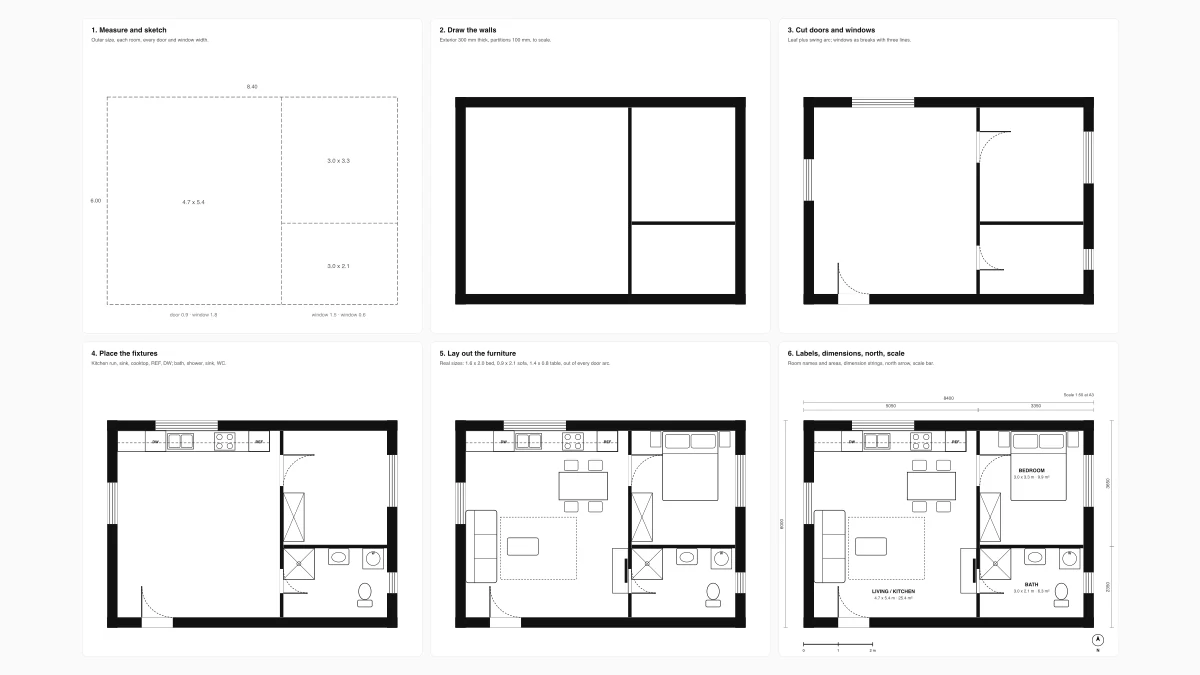
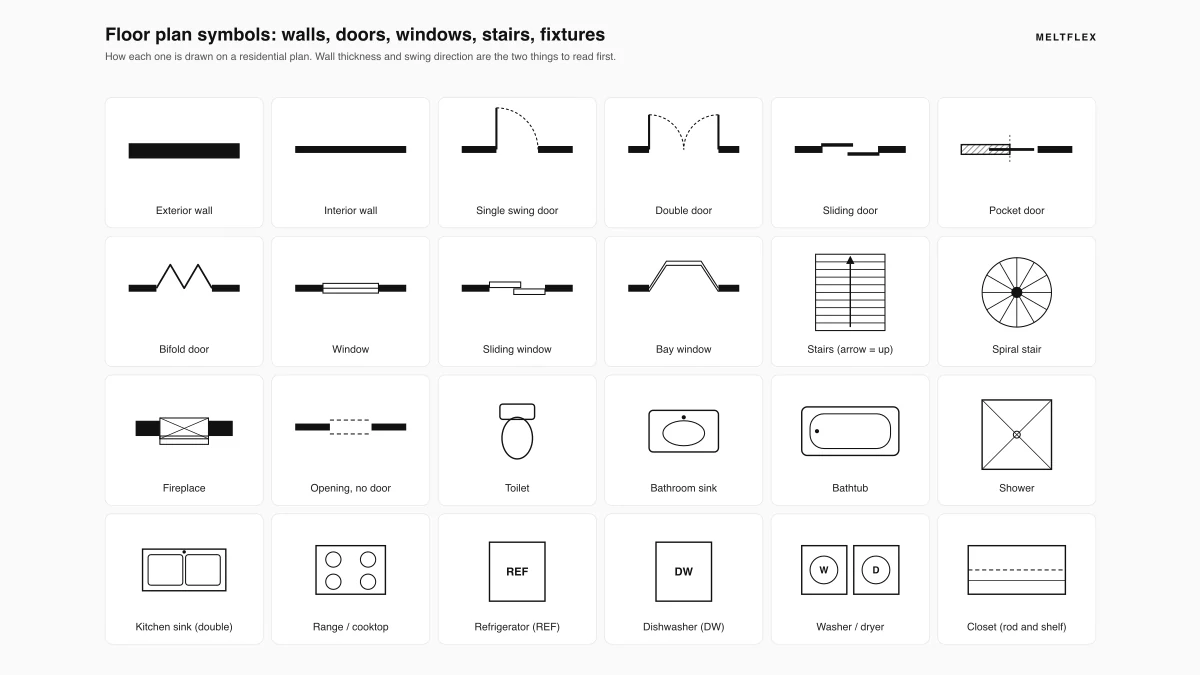
If you want to check the AI's reading against your own, every wall, door arc, window break and dashed line it looks for is explained in our floor plan symbols guide. If you do not have a plan yet, that is a different category of tool, compared in the best floor plan software, and how to draw a floor plan covers drawing one that converts cleanly.
3D Render From a Floor Plan vs a 3D Model
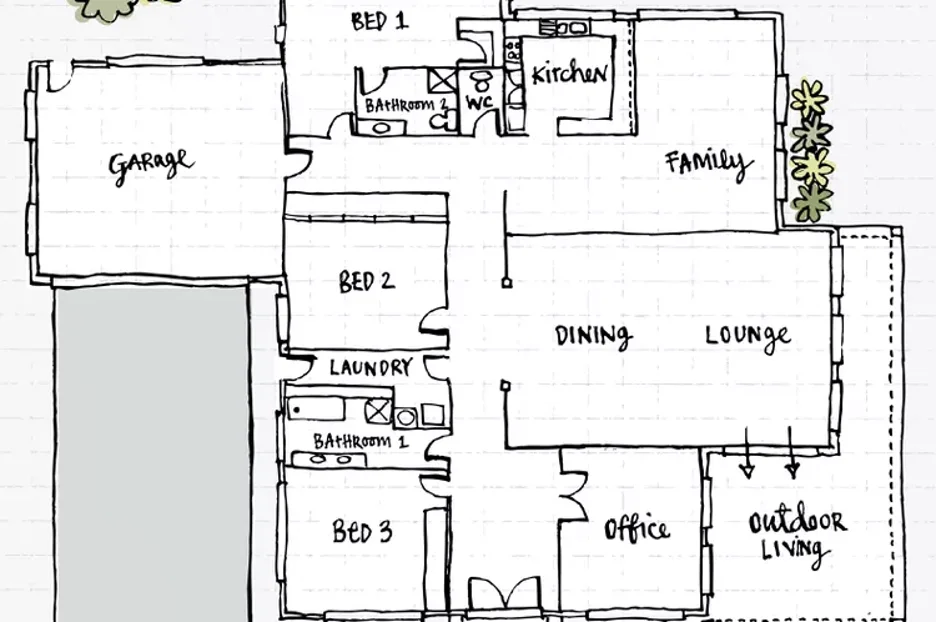
The two words get used interchangeably and they are different things. A 3D model is geometry: walls, openings and volumes you can orbit, measure and walk through. A 3D render is a lit picture, with materials, a camera and light. Here is the same plan at all three stages, all from our test.
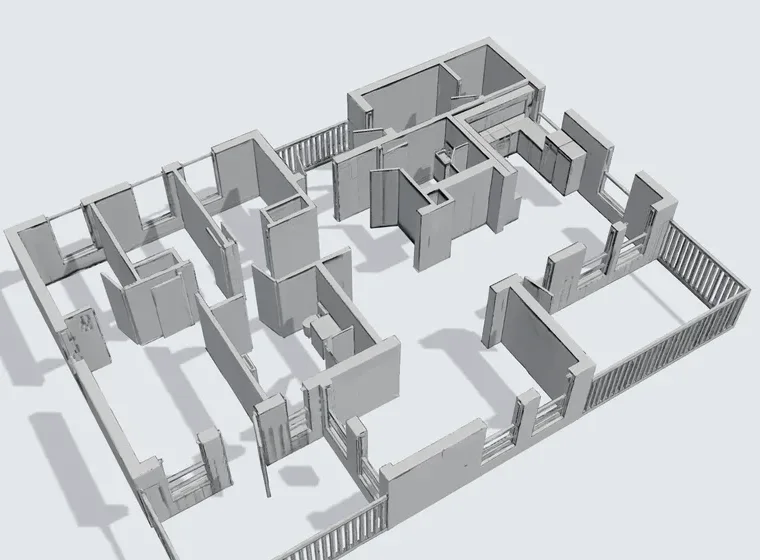
That is worth saying plainly, because it decides what the output is good for. A render from a plan alone is a marketing image, not a specification. It is genuinely useful for selling off-plan, for a listing with no photographs yet, or for showing a client a direction. The same limits we cover in why AI renders look fake apply twice as hard here, because the model starts from even less information.
There is a third thing people mean by this, especially for houses in India: a front elevation, the facade drawn square on. That is a prompt job rather than a conversion, and we measured it in house elevation design prompts.
How to Get a Good 3D Render From a Floor Plan
- Pick the view before the style. Top-down keeps the plan readable and the labels legible; isometric looks more like a model but hides the rooms behind the walls.
- Choose how much furniture you want. Empty is best for judging the layout, furnished for a listing, fully styled for a mood.
- Name the finishes if the tool lets you. A style preset gives you the tool's house look, not yours.
- Check it against the plan. Count doors, windows and fixtures room by room. Invented fixtures, like our tub, are the most common error and the easiest to miss once the picture looks good.
Can ChatGPT or Gemini Turn a Floor Plan Into 3D?
They can turn it into a 3D-looking picture, and people try this first because it is free and already open in another tab. Upload the plan, ask for a top-down or isometric render, and you get an image back in seconds. Two limits: it is a picture, not a model, and general models drift from the drawing unless the prompt pins the layout down, so rooms change size and doors wander. Our AI floor plan prompts include the wording that keeps the model closest to your plan. For a result you can rely on room by room, use a dedicated converter.
How Much Does a 3D Floor Plan Cost?
With AI tools, less than most people expect. Every tool we checked has a free tier of some kind, usually enough for one or two plans. Beyond that, the cheapest paid options listed on 29 September 2026 were:
The real cost is usually not the subscription but the number of tries. Plan to convert a plan two or three times while you fix the input, which is why a clean upload saves more money than a cheaper tool.
How to Get the Best Floor Plan to 3D Result
Whichever tool you pick, the output depends heavily on the plan you feed it.
Start With a Clean, High-Contrast Plan
Dark lines on a white background read best. Blurry photos, heavy shadows and faint pencil lines all hurt wall detection. A clear phone photo of a paper sketch is fine if the lines are crisp.
Shoot It Straight On
Angled photos distort the walls. Hold the phone directly above the page and keep the whole plan in the frame; if the walls are cut off at the edge, the tool cannot close the rooms.
Know the Free-Tier Limits Before You Commit
Free means one to five plans on almost every tool here, often watermarked. Run your real plan through the free tier first and judge the quality before you pay.
Convert House Plans and PDF Floor Plans to 3D
Two inputs trip people up: a whole-house plan and a PDF. Here is what to expect from each kind of input before you upload.
House plans. A house plan is a floor plan for the whole home, often several rooms and sometimes several floors on one sheet. Upload one level and the AI maps every room, hallway and doorway into one connected result. It is the fastest way to preview a new build from a builder's brochure or lay out an open floor plan across the ground level.
PDF floor plans. Most architect and listing plans arrive as a PDF. Floor-plan.ai, Dehome, Edensign, Coohom and Planner 5D take the PDF directly. MeltFlex and the other image converters need it exported to JPG or PNG first; export at full resolution so thin interior walls survive. Once the shell is built, you can place furniture at exact scale in each room before you commit.
Designing a Second Floor or a Multi-Story Plan
This is the question we get asked most, and almost no tool answers it on its page. None of the 13 converts a multi-story house into a single stacked 3D building from one upload. They all work one level at a time, and that is the better workflow anyway.
Crop your sheet so only the second floor is in the frame, convert it, then do the ground floor. Keep the same crop width on both so the floors read at the same scale side by side. Remember the stairwell: it appears as an opening on both sheets and is the one element the AI cannot connect between two separate conversions. If the plan stacks both floors on one page, do not upload the whole sheet, because the AI reads it as one enormous flat level.
How to Convert a Floor Plan to 3D With MeltFlex, Step by Step
Any of the plan-reading tools above follows a similar flow. This is how it runs in the MeltFlex floor plan to 3D tool today.
1. Upload an image of your plan. A JPG or PNG of an architect drawing, a listing plan, a screenshot of a PDF page or a photo of a hand-drawn sketch all work.
2. Pick the render style, view and furniture. Six styles from architectural drawing to photorealistic, top-down or isometric, and empty, furnished or fully styled. Then an interior style, or leave it on Auto.
3. Convert and check. The render comes back in roughly 20 to 30 seconds. Compare it with your plan room by room before you use it anywhere.
4. Want a model file? Ask for the GLB. It takes two to three minutes and 100 credits, and you can open it in any 3D viewer or tool that reads GLB.
5. Carry on in the workspace. The render opens in the same workspace as MeltFlex's room photo tools, so you can restyle it or move on to photos of the real rooms. Try it on your own plan and judge the result on your layout, not ours.
Watch: Turning a 2D Floor Plan Into 3D
A short screen recording of a 2D floor plan becoming a furnished 3D view in MeltFlex. It was recorded in June 2026, so the controls on the tool page today look different from the video.

Frequently Asked Questions
How do I convert a 2D floor plan to a 3D model for free?
Upload a clear JPG, PNG or PDF of the plan to an AI converter and let it read the walls, doors and windows. Free tiers are small but real: MeltFlex gives one furnished 3D render on its 15 signup credits, Edensign converts your first 2 plans, Dehome gives 4 credits (one conversion), ArchyBase gives 2 generations, and floorplanmaker.ai converts without an account. If you want an editable model rather than a picture, Coohom and Homestyler have free plans, and SketchUp Free lets you model it yourself from the plan.
What app can I use to convert my floor plan to a 3D model?
It depends on what you want back. For a furnished 3D picture of the plan, use MeltFlex, Floor-plan.ai, Edensign or Dehome. For a 3D model you can download, floorplanmaker.ai and MeltFlex return a GLB file. For a model you keep editing room by room, Planner 5D (its AI upload is on the Premium plan), Coohom or Homestyler. Cedreo, Arcadium 3D, Floorplanner, HomeByMe and SketchUp do not read the plan for you: you trace the walls over it yourself.
Can ChatGPT convert a floor plan into a 3D model?
Not into a model. ChatGPT and Gemini can turn an uploaded plan into a 3D-looking picture, such as a top-down or isometric render, but they return an image, not geometry you can orbit or measure. They also drift from the drawing: rooms change size and doors move unless the prompt pins the layout down. For a picture, a careful prompt works; for a model or a render that holds your walls, use a dedicated converter.
How much does a 3D floor plan cost?
With AI tools, very little. Most have a free tier that covers one or two plans, and the cheapest paid plans we checked on 29 September 2026 ran from about $9.99 to $20 a month: Floor-plan.ai $9.99 a month, Dehome a $9.99 credit pack, SketchUp Go $10.75 a month billed yearly, ArchyBase $15.92 a month billed yearly and Edensign $20 a month. A downloadable 3D model in MeltFlex costs 100 credits, which needs a paid plan.
Is there a floor plan to 3D converter with no signup?
Of the 13 tools we checked, floorplanmaker.ai is the only one whose page says no account is required. It returns a plain GLB shell with no furniture. Every other tool asks you to sign in before it converts, at least for anything you can keep.
What is the difference between a 3D render from a floor plan and a 3D model?
A 3D model is geometry: walls, openings and volumes you can orbit, measure and walk through, usually delivered as a file such as GLB or OBJ. A 3D render is a single lit picture of a room or a plan, with materials, a camera and light applied. Some tools give you only the render, some only the model, and a few give both. If you want an image for a listing or a client, you need the render. If you want to move walls or furniture later, you need the model.
Is a 3D render generated from a floor plan accurate?
It is accurate about the layout and invented about everything else. The plan fixes where the walls, doors and windows go. It does not say what the floors are made of, how high the ceiling is or what furniture goes where, so the AI fills that in. In our own test the render kept every room and its square footage but added a freestanding tub the plan did not have. Use a plan render to show a direction or market a listing, never as a specification for a contractor.
Can I convert a hand-drawn floor plan to 3D?
Yes. Draw the walls as thick dark lines, label the rooms, photograph the sheet straight on in even light, and upload it. Most AI converters, including MeltFlex and Edensign, accept hand-drawn plans and scans. The result is right about the layout and proportions, and only as accurate on dimensions as your sketch was.
Can I convert house plans or a PDF floor plan to 3D online for free?
Yes. A house plan converts the same way as a single apartment plan. Many converters take a PDF directly (Floor-plan.ai, Dehome, Edensign, Coohom, Planner 5D); for the rest, export the page as a full-resolution JPG or PNG. If the sheet shows more than one floor, crop it and convert one level at a time.
Can I convert a DWG or CAD file to 3D?
Only some tools read CAD files directly. Planner 5D lists DWG and DXF uploads, Coohom accepts DWG and DXF, and Cedreo takes them as a tracing underlay. AI image converters such as MeltFlex, Floor-plan.ai and Edensign need an image or PDF, so export a plan view from your CAD program first.
Can I upload a floor plan and design a second floor?
Yes, one level at a time. None of the tools we checked stacks a multi-story house into one 3D building from a single upload. Crop the sheet so only the second floor is in frame, convert it, then do the ground floor with the same crop width so both read at the same scale. Never upload a sheet with both floors on it: the AI reads it as one oversized flat level.
Which floor plan to 3D tools furnish the rooms automatically?
The render-first AI tools: MeltFlex, Floor-plan.ai, Edensign, Dehome and ArchyBase all put furniture in the rooms for you. The editors (Planner 5D, Coohom, Homestyler) and the tracing tools (Cedreo, Arcadium 3D, Floorplanner, HomeByMe, SketchUp) leave you to place furniture yourself.
Is an AI 3D model accurate enough for renovation planning?
For layout, proportions and furniture planning, yes, because the walls come from your plan. For structural or construction work, no: ceiling heights, wall thickness and sill heights are guessed, and the meshes are approximate. Use a surveyed CAD drawing for anything a builder will build from.
Which Floor Plan to 3D Tool Should You Use?
If you want to see your plan furnished today, use a render tool: MeltFlex, Edensign or Floor-plan.ai, and try the free tier on your real plan before paying. If you need a file to keep working in 3D, floorplanmaker.ai gives a free shell and MeltFlex gives a GLB from the same upload as the render. If you want to edit every wall yourself, Coohom and Homestyler are the free places to start. Whichever you choose, check the output against the plan before you trust it. Convert your floor plan with MeltFlex and compare it with the drawing the same way we did.



)