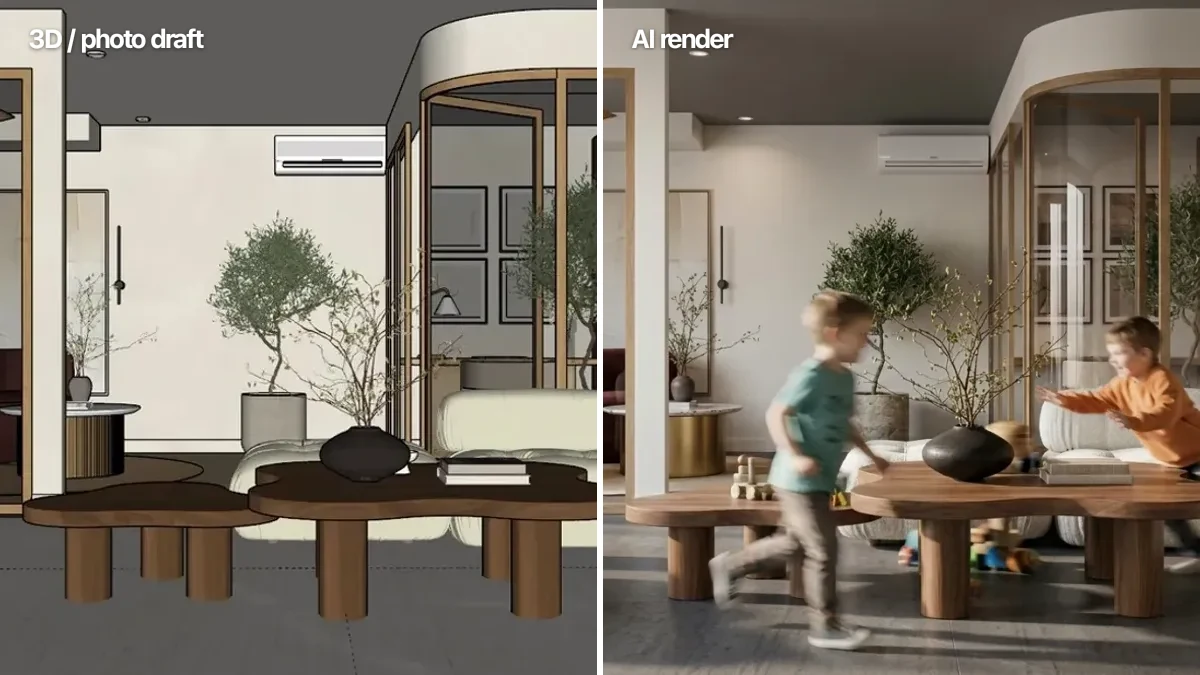
Short answer: to turn a 3D model into a photorealistic render, take a screenshot of your SketchUp, Revit or Blender viewport (or a plain grey clay render), upload it to a photo-to-render tool, and describe the materials and light you want in one sentence. It hands back a photorealistic render in about 20 seconds, keeping your geometry and camera exactly. No V-Ray license, no render engine, no GPU. The same still image from a visualization studio runs $250 to $2,500 and takes 3 to 7 days (Realspace3D, NoTriangle Studio). This guide shows it happening on real models, then walks the exact workflow.
Our articles are still written by humans!
Get human written articles in your Google feed.
What “3D Model to Photorealistic Render” Means in 2026
For most of rendering history, the render was the expensive part. You modeled the building, assigned every material, placed lights, set up a camera, then handed the scene to a render engine or a specialist and waited. A single presentation image could cost more than a week’s rent and take just as long to come back. The model was the easy 20 percent. Photorealism was the other 80.
AI flipped that ratio. If you already have a model, even a rough one, the photorealistic image is now the fast part. You do not rebuild the scene in a render engine. You do not tune lights for an afternoon. You show the AI a picture of your model and tell it what the materials and light should be, and it renders the same geometry photorealistically in one pass. The design work stays yours. The slow, costly draft-to-photoreal step is what disappears.
The rest of this article proves it on three real inputs, a SketchUp interior, a grey clay exterior and a rough draft bedroom, then breaks down how to do it well and where an engine like V-Ray still earns its place.
A SketchUp Screenshot Becomes a Render
Start with the most common case: you have a SketchUp model open, walls and furniture blocked in, no materials, no lights. In the old workflow that model is the beginning of days of work. Here it is the input. We took a plain hidden-line view of a living room, dropped it straight into the render tool, and asked for warm plaster walls, a white oak floor, a linen sofa and soft late-morning light.
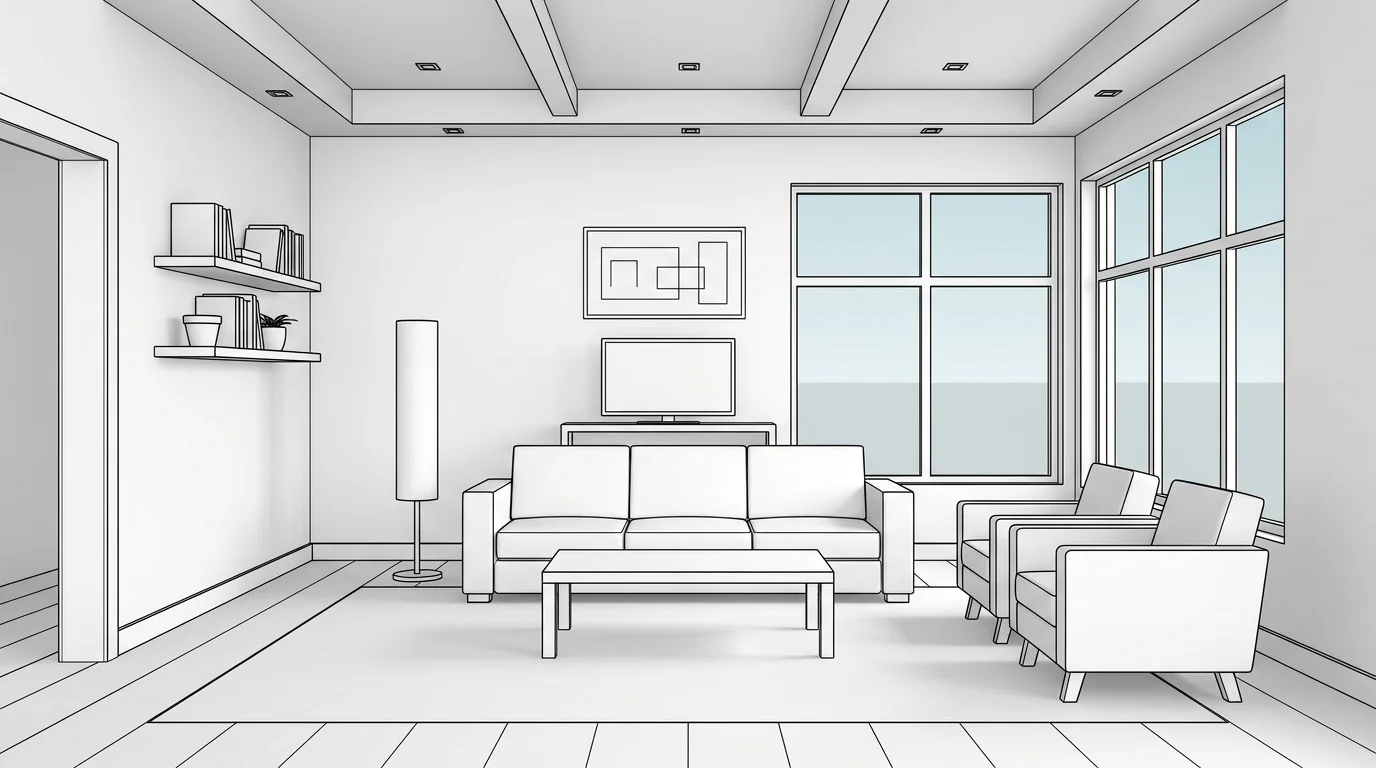
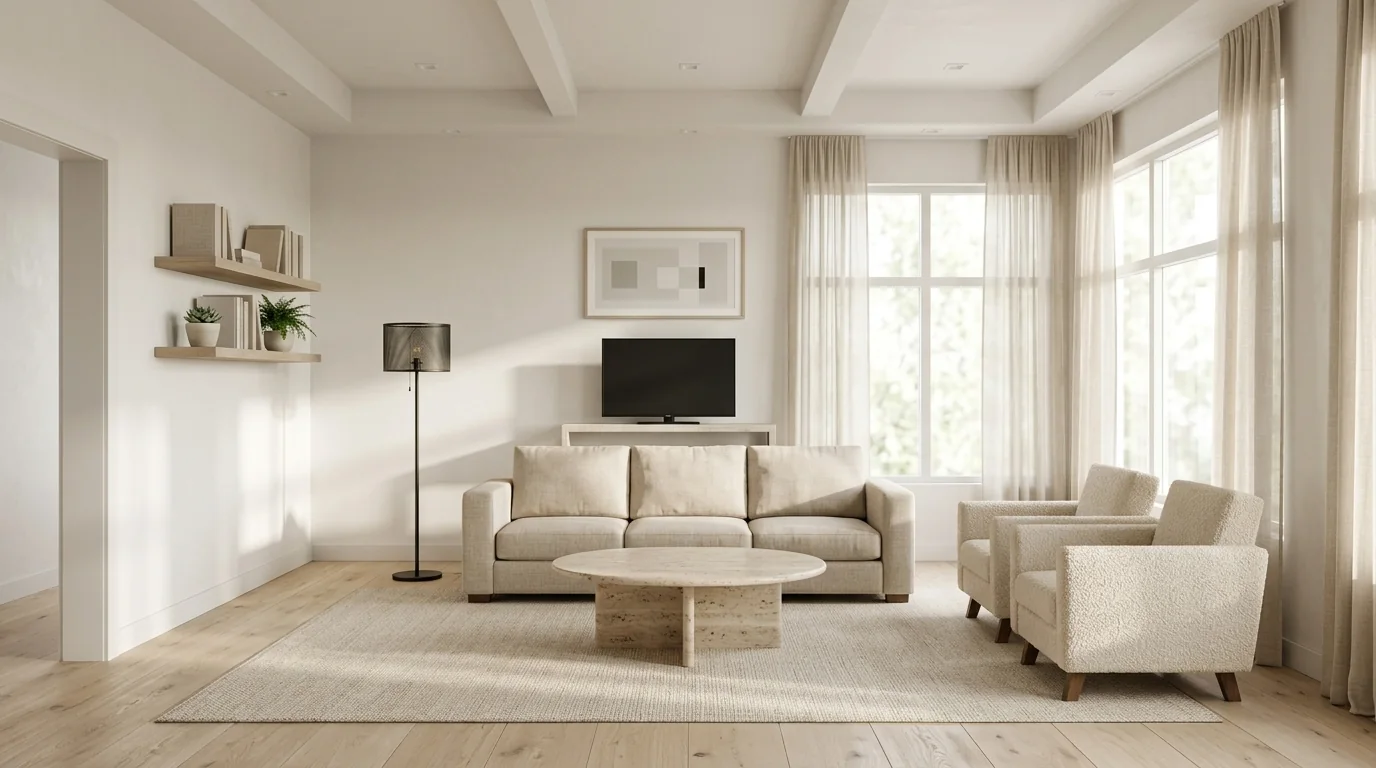
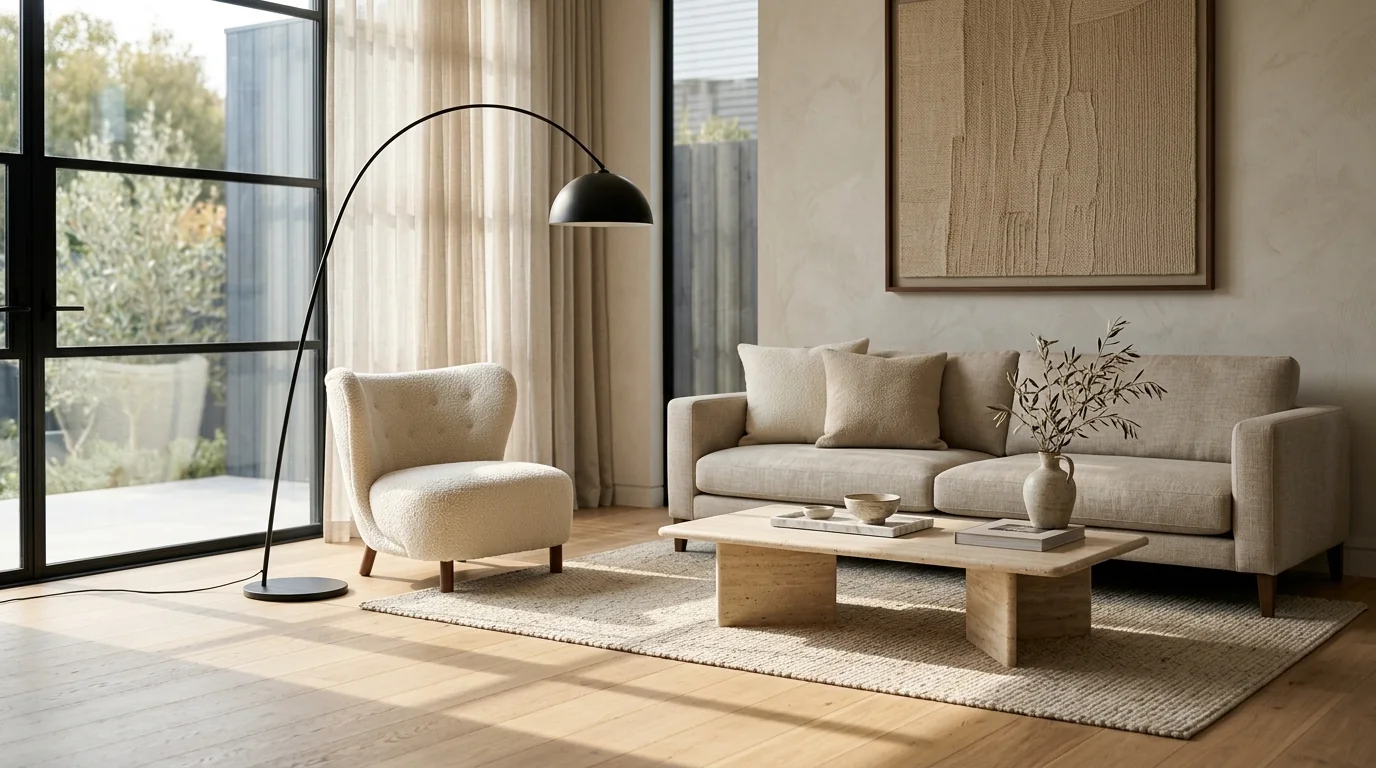
Look at what stayed and what changed. The sofa, the two armchairs, the coffee table, the window, the wall shelf and the camera angle are all where you put them. What the AI added is everything that used to take the hours: real material response on the linen and oak, soft daylight raking across the floor, believable contact shadows under each leg, a wool rug that reads as wool. That split, your geometry, its realism, is the whole model-to-render idea in one image.
A Grey Clay Model Becomes a Real House
Exteriors are where clay renders and white massing models live. Architects build them constantly to study form before anyone commits to a material. Normally that clay model waits until the project is worth a full visualization budget. It does not have to. We fed a plain grey clay render of a modern two-story house, uniform matte grey on everything, into the tool and asked for a limewashed plaster facade, bronze windows and a blue-hour sky with the interior lights on.
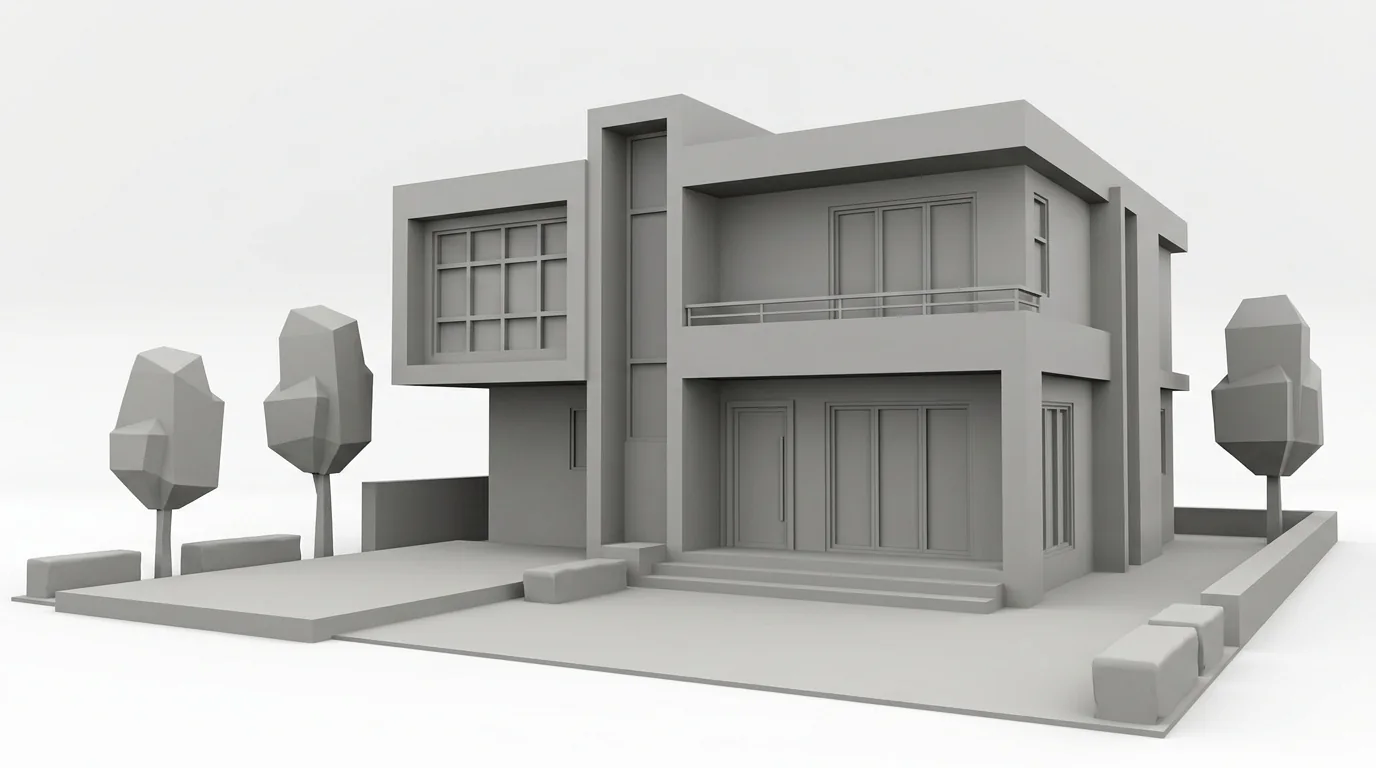
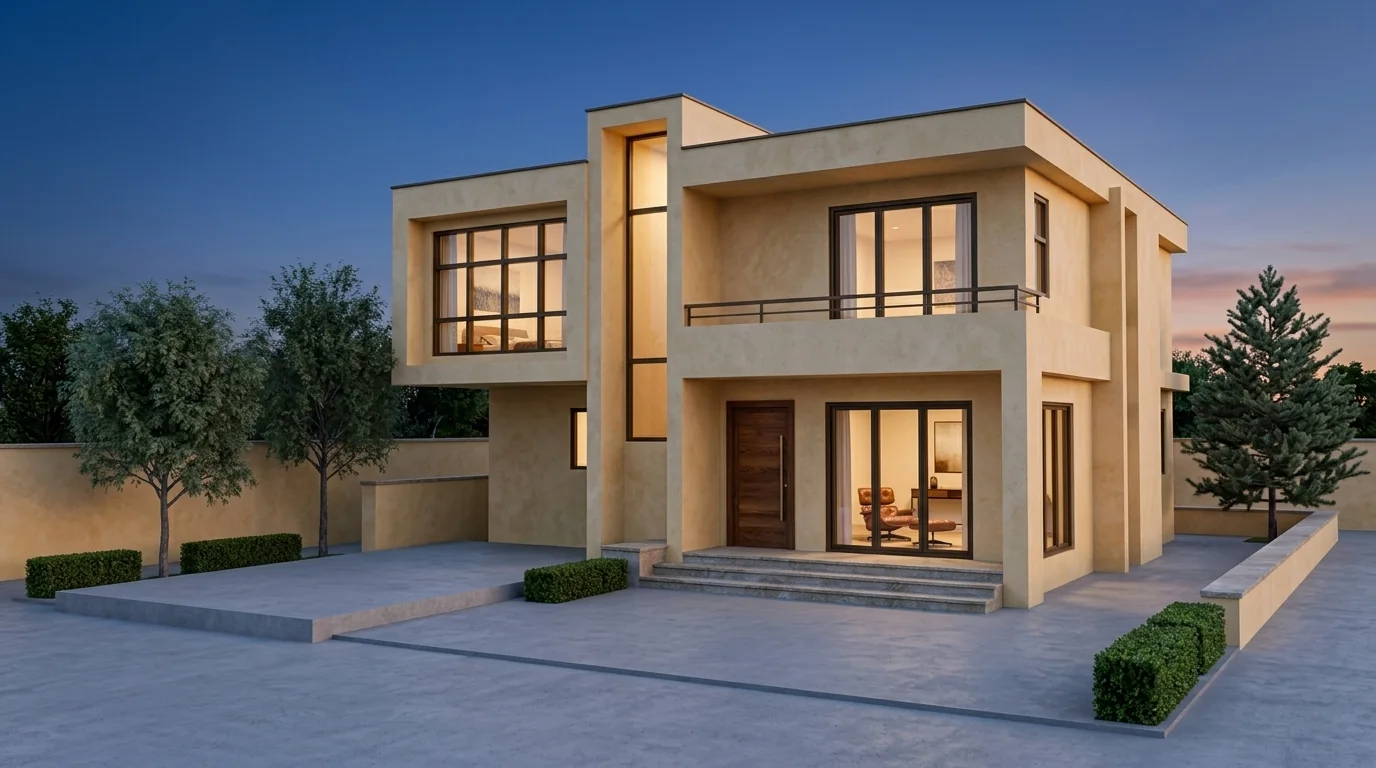
The massing, window grid, roofline, entry steps and driveway are unchanged, because the AI read them from the clay. What it invented is the part clients actually respond to: the warm interior glow against a cool dusk, the plaster catching the last light, foliage that grounds the building on its site. This is the difference between a form study and an image that sells the project, and it took one prompt. If exteriors are your main job, the AI exterior design tool is the same engine tuned for facades, materials and twilight shots.
A Rough Draft Becomes a Room Worth Showing
Not every input is clean. Plenty of models are half-textured drafts with muddy default materials and flat lighting, the render that makes you wince before a client call. Those work too. We took a rough draft bedroom, cartoon-flat floor, plasticky furniture, dead grey light, and asked for greige walls, an oak bed, layered linen bedding and soft morning light.
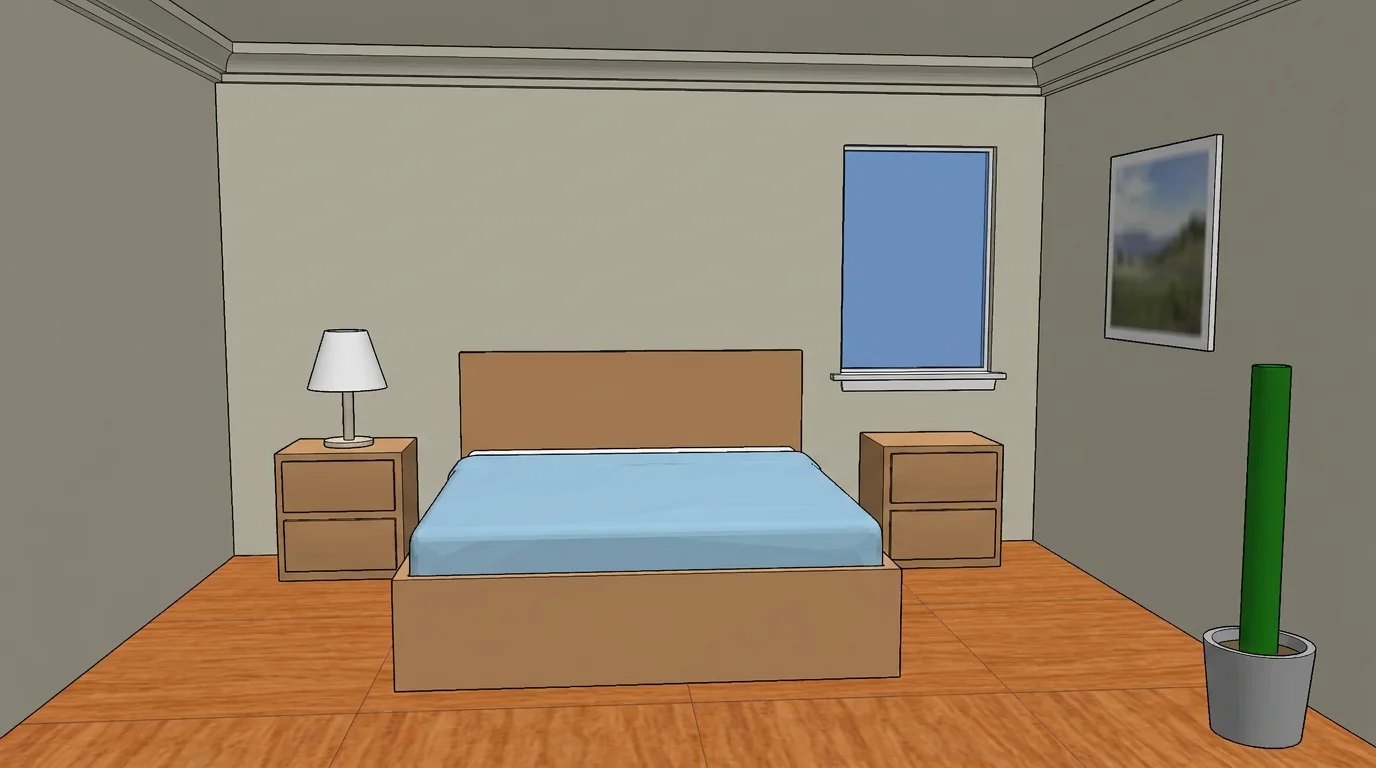
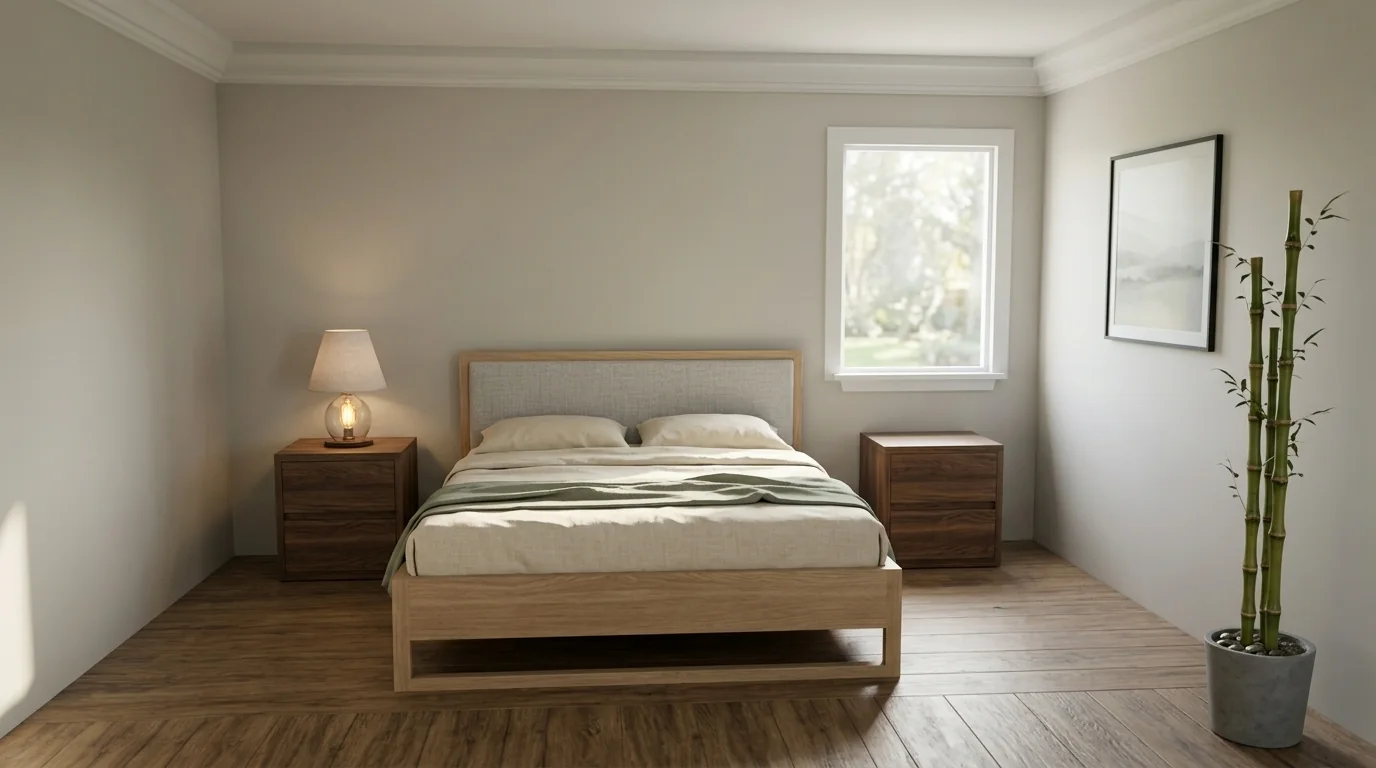
Same bed, same two nightstands, same window and plant. But the flat draft light became directional morning daylight with long soft shadows, the plastic surfaces became real oak and linen, and the room stopped looking like a model. A draft you would have hidden becomes a frame you would put in the deck.
A Kitchen Model Becomes a Real Kitchen
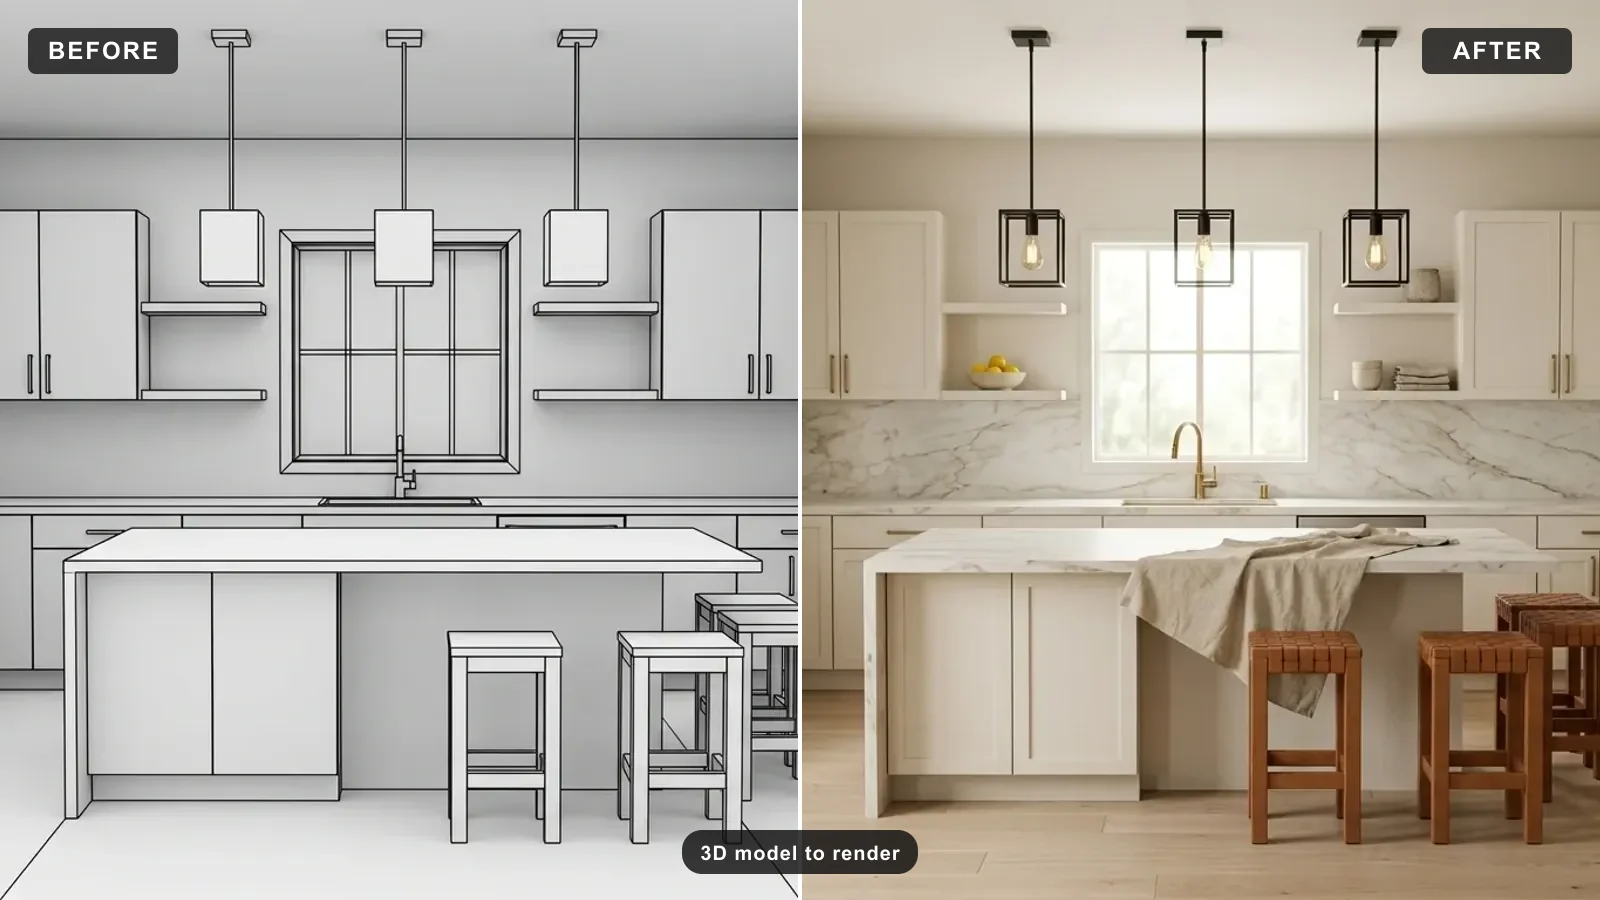
Kitchens are the hardest room to sell from a model, because clients read them in materials: the counter, the backsplash, the cabinet finish, the hardware. A grey massing model tells them none of that. So we blocked out a plain SketchUp kitchen, island, cabinet runs, three stools, pendants over the island, and asked for shaker cabinets, a Calacatta marble island and backsplash, brass hardware and warm morning light.
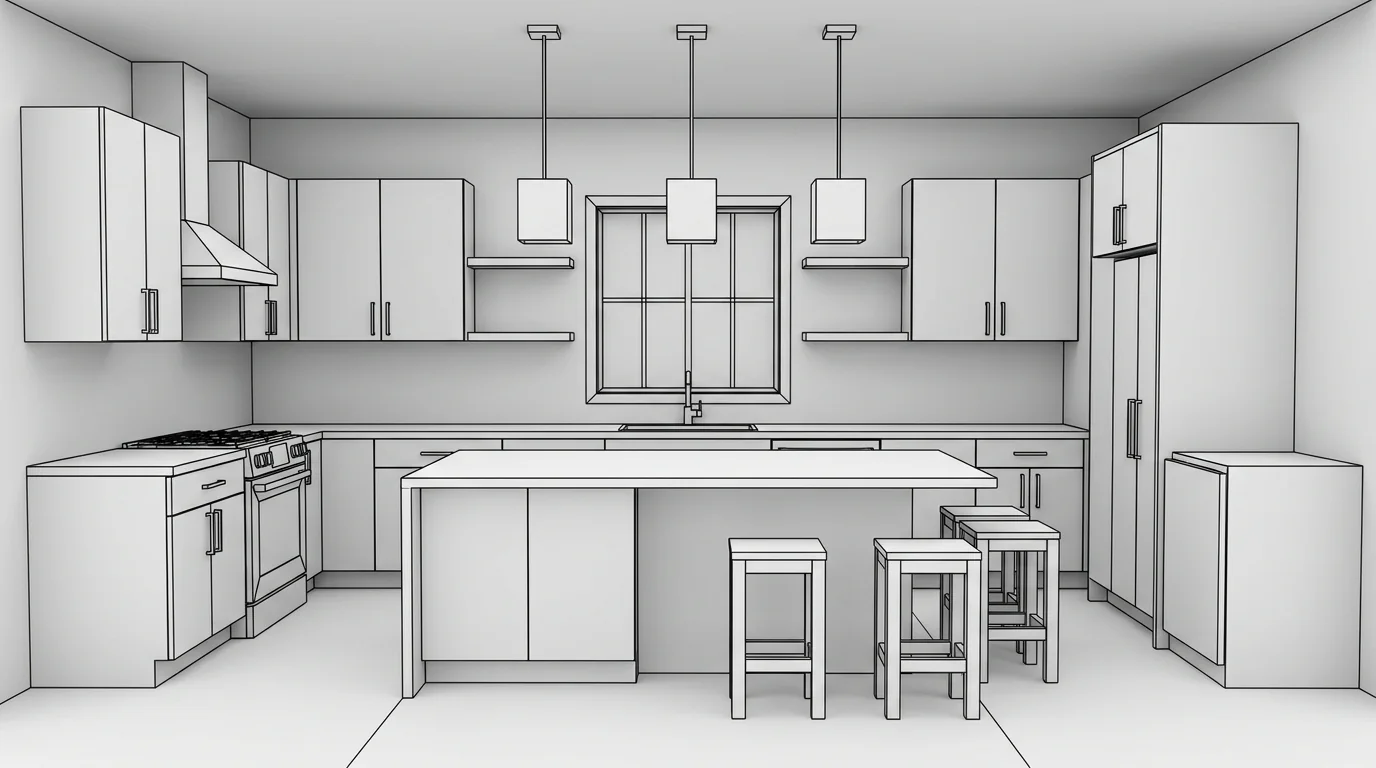
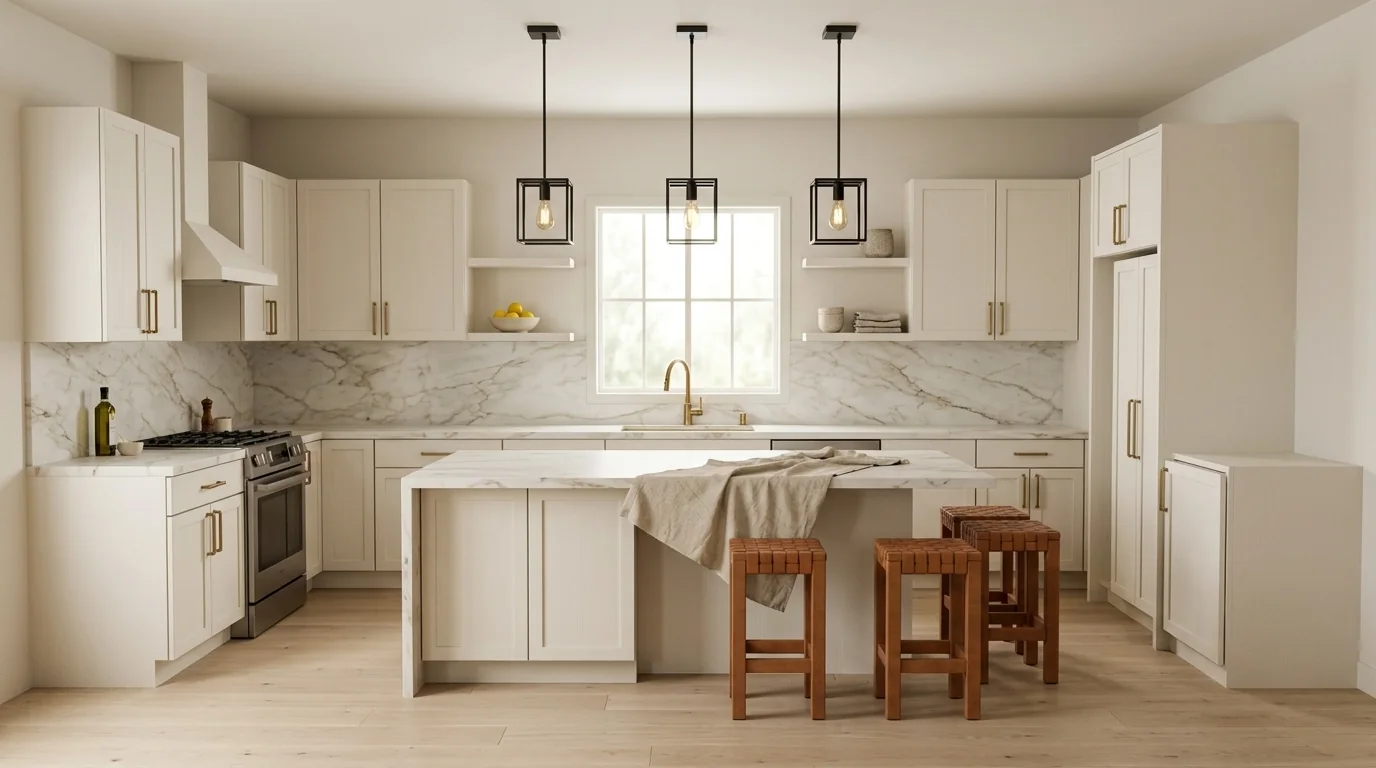
The cabinet layout, the island footprint, the three stools, the pendant spacing and the window are all exactly as modeled. What changed is everything a kitchen client decides on: the marble veining, the warmth of the brass, the grain of the oak floor, the way morning light falls across the counter. This is the same move behind our dedicated AI kitchen design tool, and it is why a model-to-render pass closes the gap between “here is the layout” and “here is your kitchen”.
The Part That Sells It: Light, Shadow and Material
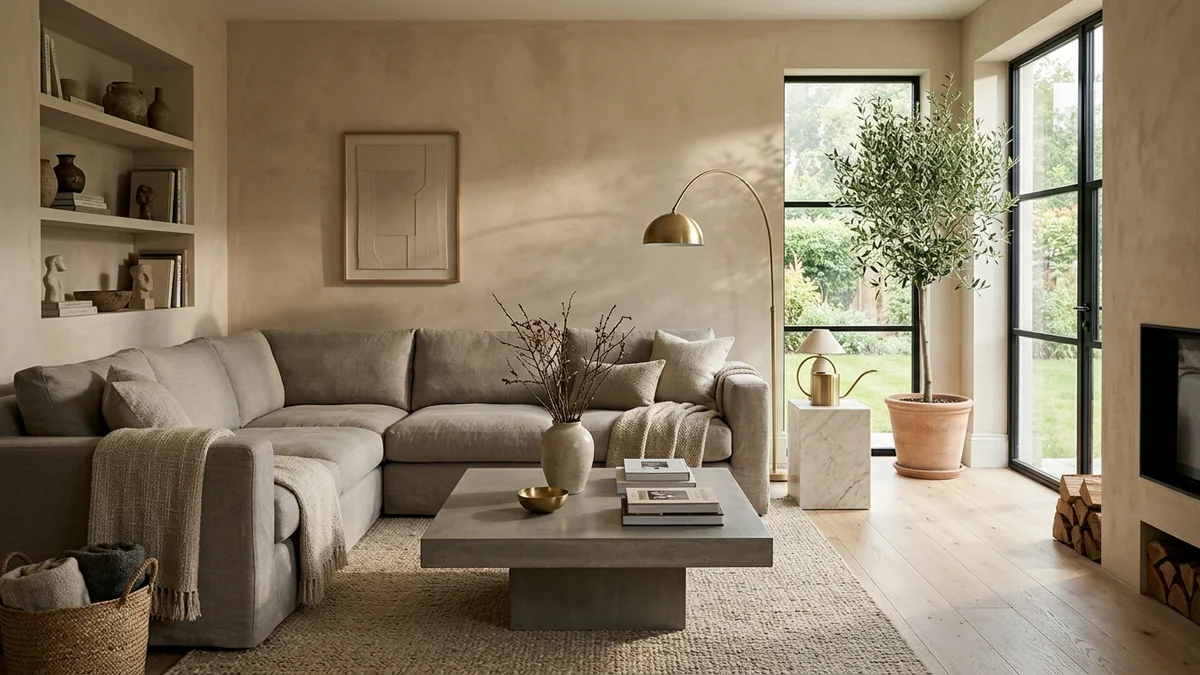
People say “photorealistic” and mean the wide shot. But realism lives in the small stuff, and it is the first thing that gives a fake render away. So look close. Here is a macro crop from one of the renders above, the corner where a sofa leg meets the oak floor and a wool rug.
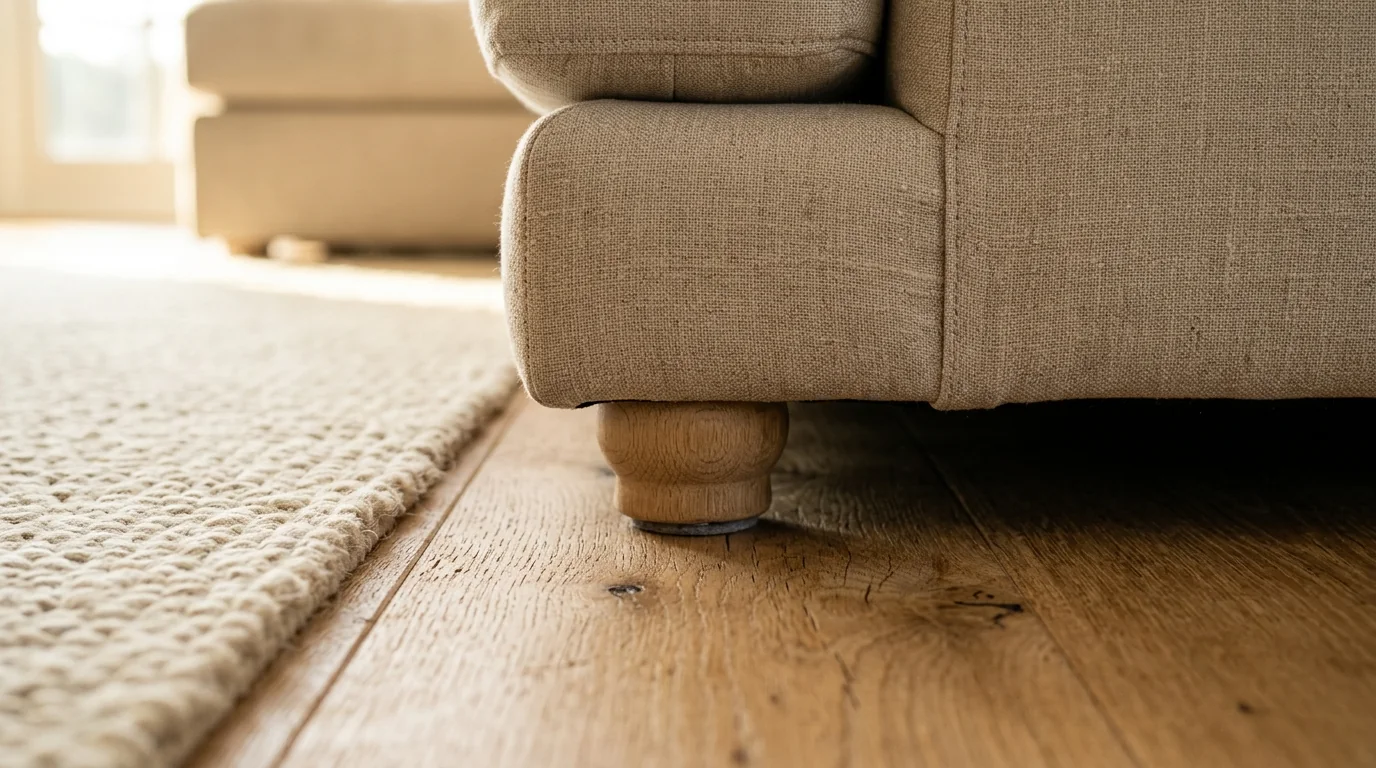
Three things are doing the work. First, the contact shadow: a crisp, soft-edged dark right where the leg touches the floor, exactly how real light behaves, not a hard drop shadow. Second, ambient occlusion: the gentle darkening in the seam and the corners where light cannot fully reach. Third, material micro-texture: you can read the linen weave and the wood grain, so nothing looks like plastic. When a render feels off, it is almost always one of these three missing. Getting all three for free, from a flat model, is what makes the workflow worth it. If you want the full craft breakdown, we wrote a whole piece on the anatomy of a photorealistic render.
Watch: Sketch to Render in 20 Seconds
If a still before-and-after still feels too clean, watch it happen in real time. This short MeltFlex demo takes a rough interior sketch and turns it into a photorealistic render in about 20 seconds, which is the exact same input-to-render move as feeding it a 3D model or a SketchUp screenshot. The input changes, the workflow does not.
A sketch turned into a photorealistic render in about 20 seconds. Video by MeltFlex AI on YouTube.
How to Turn a 3D Model Into a Photorealistic Render
The whole loop is four moves, and you can do all of them in a browser.
- Capture a view of your model. Screenshot your SketchUp, Revit or Blender viewport, or export a clay render. Textures and lights are optional. A flat grey model is enough.
- Upload it. Drop the image into a photo-to-render tool. It reads the geometry, proportions and camera straight from the picture.
- Describe materials and light. One or two sentences: the materials, palette, time of day and mood. That is the brief.
- Generate and refine. A photorealistic render comes back in about 20 seconds. Change one thing, regenerate, repeat until it matches, then download.
Because each pass is seconds, not days, you iterate instead of commissioning. You can try the space in ten material directions or push the light from noon to dusk before lunch, then turn the winning frame into a moving AI video walkthrough for the presentation. The design judgment is yours. The tool just removes the wait between deciding and seeing.
What You Can Feed It
The tool does not care which modeler you use, because it works from an image, not a file format. If you can get a picture of it, you can render it. That covers almost every source a designer touches.
If you live in SketchUp specifically, you can skip the screenshot entirely and render from inside it with our SketchUp AI rendering plugin. Everything else, screenshot and upload.
Render Without V-Ray: The Honest Comparison
V-Ray, Corona, Lumion and Enscape are real, powerful tools. The point here is not that AI replaces them, it is that for the fast, photoreal-from-a-model step, you no longer need them. Here is the honest side by side.
For concept design, client previews, renovation options, listing visuals and social content, the AI column wins on every axis that matters day to day. For a final, construction-accurate hero image at print resolution, the engine column still wins. Most projects need a lot of the first and a little of the second. For a wider look at the market, we tested the best AI architectural rendering tools head to head.
Where V-Ray and Physical Engines Still Win
Being honest about the limits is what makes the workflow trustworthy. AI photo-to-render is not the right tool for everything.
- Millimetre-exact accuracy. If the render must match a built model down to the reveal detail, a physical engine tied to your CAD is safer.
- Guaranteed material fidelity. When a client has specified an exact product, finish and sheen that must appear precisely, a set-up material beats a described one.
- Print-resolution finals. For large-format print, a native high-resolution engine render still has the edge.
- Animations and flythroughs from geometry. True camera paths through a model belong to real-time engines, though AI now handles short video from a render well.
Notice the pattern: the engine wins at the final, exact, contractual end. AI wins at the fast, exploratory, persuasive end, which is most of the work, most of the time. Use each where it is strong.
Prompt Tips for Model-to-Render
The model carries the geometry. Your words carry the realism. A few habits get you a client-ready image faster.
- Name materials, not moods. “White oak floor, limewashed plaster, brushed brass” beats “make it nice” every time.
- Set the light explicitly. Time of day and direction do most of the emotional work. “Soft late-afternoon light from the left” changes everything.
- Protect the geometry. If the layout drifts, add “keep the exact same room structure, furniture placement and camera angle” and regenerate.
- Change one thing at a time. Iterate on the palette, then the light, then the materials. Chasing all three at once makes it hard to see what helped.
- Stay restrained. The fastest way to look amateur is clutter. One strong material story reads as designed. Ten competing ideas read as a mood board.
For deeper prompt craft, our library of AI render prompts has 40 copy-paste prompts for materials, lighting and camera, our guide to interior design prompts that actually work goes further on wording, architectural rendering prompts covers buildings rather than rooms, and how to render architecture with AI covers the exterior and text-to-render side.
Frequently Asked Questions
How do I turn a 3D model into a photorealistic render?
Screenshot your 3D viewport or export a clay render, upload it to a photo-to-render tool, and describe the materials, lighting and mood in one sentence. The tool reads the geometry and camera from your image and returns a photorealistic render in about 20 seconds, keeping your layout intact. No render engine, no GPU, no V-Ray.
Can I render without V-Ray?
Yes. AI render tools produce a photorealistic image from a flat model screenshot or clay render without V-Ray, Corona, Lumion or any physical engine, and without a powerful GPU. V-Ray still wins for construction-accurate, print-final images, but for concept, iteration, previews and marketing, AI gets you there in seconds instead of hours.
Does it keep my model geometry and camera angle?
Yes. Because you feed it a view of your actual model, the render preserves the geometry, furniture placement, openings, proportions and camera. It changes materials, lighting and realism, not the design. If anything drifts, tell it to keep the structure exactly and regenerate.
Can I turn a SketchUp screenshot into a render?
Yes, a plain SketchUp screenshot is one of the best inputs. You do not need a plugin, a textured model or a set-up scene. A hidden-line or shaded viewport grab, exported or even a simple screen capture, carries enough geometry for the AI to render a photorealistic version of the same space.
Do I need a textured or finished model?
No. A raw grey clay model or untextured viewport is often the best input, because there are no half-finished materials for the AI to fight. The realism comes from your text brief, not the model.
Is an AI render good enough to show clients?
For concept design, early options, renovation previews and marketing, yes, and increasingly for near-final images. The honest limit is millimetre-precise control: if a client needs the render to match a built model exactly, a physical engine or a CAD-integrated plugin is safer. For fast, photorealistic visuals that win the conversation in the room, an AI render is already enough.
Can I do it for free?
Yes, for the first one. A new MeltFlex account starts with 15 credits and a render costs 10, so you can turn a model screenshot into a render and judge the quality before paying anything. Paid plans lift the render count and resolution and add commercial rights.
One Engine, the Whole Workflow
Model-to-render is one door into the same engine. Once your render is out, the rest of the pipeline is right there: restyle just the floors with floor restyle, redesign the outside with exterior design, work a specific room with AI kitchen or AI bathroom design, furnish and stage an empty space in the full editor, or turn a finished render into a moving AI video walkthrough for the presentation. Modeling in SketchUp all day? Skip the screenshot and render from inside it with the SketchUp plugin. Want to browse finished examples first? See the interior design examples gallery.
Turn your model into a render now
Upload a SketchUp screenshot, a clay render or a phone photo. Describe the look in one sentence. Get a photorealistic render in about 20 seconds, free to try, no V-Ray required.
Try photo-to-render free


)